
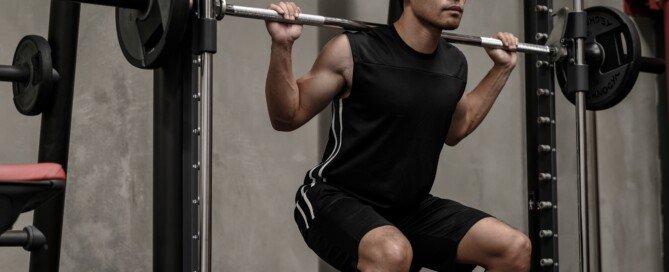
When Smith Machine Squats Are Better than a Free Barbell

There are circumstances under which the Smith machine for squats is better than a free barbell.
The Smith machine is actually better for squats than the free barbell — if you meet certain criteria.
There is a lot of controversy and disagreement in the fitness world when it comes to the Smith machine vs. free barbells for performing squats.
Which is better: Smith machine or free barbells for squatting?
This depends on your goals, and it depends on you.
If you insist that the Smith machine is worthless, can you honestly say you’ve never seen a man with king-sized quads using the Smith machine for squats?
He probably squats with a free barbell, too, but have you ever seen him doing such?
The Smith machine is a good piece of equipment for people who, for one reason or another, have problems with the free barbell.
If a person has a weak low back but good strong legs, do you really think he or she should push to muscle failure with free barbell squats?
Their back will cave long before their legs get fatigued; hence, they’ll never gain mass in their legs.
This is where the Smith machine comes in; it will allow them to push the legs hard without their back giving out.
People with weak backs that hurt under the tension of heavy or even light squatting need to work on strengthening their back — however much possible, since there may be a permanent spinal issue with a disc.
But in the meantime, the Smith machine is the equipment of choice for when these people squat.
And what if they just can’t remedy their back problem?
A person whose back gets tweaky upon doing free barbell squats with challenging weight will have to quit the set prematurely.
However, their back may feel just fine upon using the Smith machine with an equally challenging weight load.
If a person has long thighs relative to calf length, this will impede efficiency of free barbell squatting.
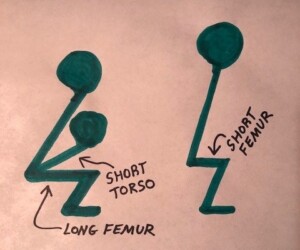
When a person has long thigh bones relative to lower leg bones, the squatting motion becomes increasingly tricky as he or she lowers closer to getting the thighs parallel to the floor – and that’s without any added weight.
The relatively long upper legs put pressure on the instep and lower shin area. The hips will feel uncomfortable unless they are flexible or loose.
The Smith machine eliminates this problem, because there is a much greater range with which to position the legs. Leg positioning with the free barbell is very limited.
Leg muscles are more isolated with Smith machine squats, which means there is good potential here to build muscle mass.
Free barbell workouts burn more calories, but what if maximum calorie burn isn’t your goal?
What if you want to blast your legs without a weak or tweaky back getting in the way? And what if the proportions of your leg bones don’t accommodate free squatting? Then the Smith machine is for you.
 Lorra Garrick is a former personal trainer certified through the American Council on Exercise. At Bally Total Fitness she trained women and men of all ages for fat loss, muscle building, fitness and improved health.
.
Top image: Shutterstock/ Auttapol Sangsub

Dumbbell Squats or Smith Machine: Which Is Better?

Smith machine or dumbbell squats?
It’s tough to assert which is better between the smith machine and dumbbell squats.
And why would you even want to compare these two, when the free barbell squat (“back squat”) is considered by many fitness experts to be the best type of squat?
It’s because not all people find the back squat to be friendly to their back or knees. Or, some really struggle with proper form.
Thus, they seek out alternatives.
If you hate doing Smith machine squats, but are able to stick to the dumbbell version, then the dumbbell squats are better for you.
This is simply due to personal preferance.
You will be able to faithfully adhere to these and you’ll more likely do them with intensity.
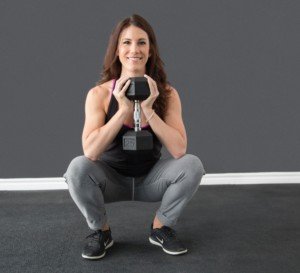
But for others, the Smith machine wins out.
Some people do not like any kind of free squatting motion, of which use with dumbbells would be one, and fare better with the tracking device of a Smith machine.
So for them, as far as adherence and morale, Smith machine squats would work better.
If you’ve done Smith machine squats and those with dumbbells, I needn’t tell you that each routine feels quite different from the other, especially when done deeply or “ATG” style (“ass to ground/grass”).
Squats with a Smith machine. Shutterstock/Auttapol Sangsub
Doing ATG Smiths feel awful in the quads, and you may not want to do these ever again.
On the other hand, though ATG dumbbell squats aren’t exactly pretty, it’s a feeling that you can tolerate, and you might not even mind doing several sets in one session, even at a highly intense level.
Dumbbell squats have a proprioceptive component that Smith work does not, plus, dumbbell work will recruit your upper body muscles, unlike Smith work.
But then again, if you require really heavy resistance to challenge your lower body, the dumbbell squats may not work too well.
Your grip will have to be able to support the weight through to muscle failure of your lower body.
Of course, the Smith machine can be loaded with hundreds of pounds.
An advantage of Smith machine squats is that you can place your feet way out in front, and have a lot of room to work with as far as foot placement and leg angle.
You can also work with just one leg, too. Try doing that with dumbbell squats.
Try both routines and see how you like them. If you like both, then include both in your training regimen.
If one feels awful, then avoid it, and stick to the other. If you like both Smith and dumbbell squats, you can do one to muscle failure, and then immediately jump right into the other for an agonizing superset.
Doing several such supersets will create some serious fat burning and strength building.
What about the back squat?

Freepik.com, prostooleh
There are some individuals for which the back squat just does not work well.
It’s the prized movement for ultimate quad and glute development, but the reality is that not everyone takes to the format.
The Smith machine, as well as dumbbell squats, then become strong options.
Lorra Garrick is a former personal trainer certified by the American Council on Exercise. At Bally Total Fitness she trained clients of all ages for fat loss, muscle building, fitness and improved health.
.
Top image: Freepik.com
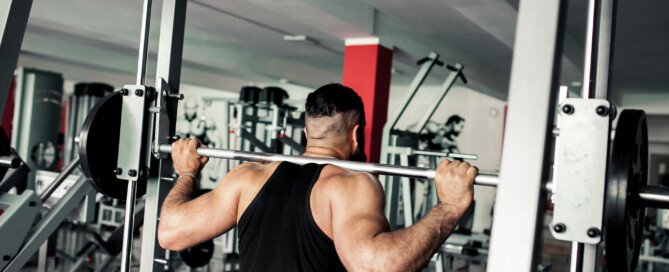
Five Biggest Squat Mistakes with the Smith Machine

Here are the biggest squat mistakes with the Smith machine.
When doing squats with the Smith machine, beware of some common mistakes.
Based on my experience as a gym personal trainer, I’ve compiled five of the biggest mistakes people commit when doing squats on the Smith machine, or a similar tracked barbell device. These Smith machine squat mistakes are in no particular order.
This first squat mistake on the Smith machine is far more prevalent among women than men, and novice women, at that.
However, being a novice doesn’t mean you should perform squats in the way I’m about to describe with the Smith machine: The legs are way too far out in front of the bar.
When the legs are out too far under the bar (or in front of it), this prevents the lower back arch; that’s one way you know the legs are out too far.
Legs being out too far de-emphasizes quad and buttocks recruitment.
Ironically, if the weight is too heavy, this too-far-out leg positioning can result in losing control of the bar.
Then again, when I see women using the Smith machine this way for their squats, they rarely go above 85 pounds.
This positioning also de-emphasizes the core muscle group, which good squat form should recruit.
The second mistake with Smith machines squats is not making sure that the bar is solidly set back in place before exiting the apparatus.
Shutterstock/Auttapol Sangsub
Make sure those little “hooks” are turned in all the way, and are completely settled upon the knobs, before exiting.
Some tracked devices require having to turn the hooks outward to set them back on the knobs. Either way, make sure the connections are solidly in place before exiting.
The third Smith machine mistake with squats is failure to set up stops to stop the bar should you lose control and it comes crashing down.

Freepik.com
The stops are built into the equipment and can be raised or lowered, then locked in place. Take the time to set these up before beginning your routine.
The fourth mistake with Smith machine squats is not paying attention to good form because you think that the equipment will take care of that for you.
This may manifest itself in mis-aligned feet, i.e., one foot is slightly ahead of the other; or, one foot is pointing more outward than the other.
Feet should be mirror images of each other, flush, at least shoulder width apart, and both pointing straight ahead; or, if you desire pointing them outward, they should be pointed outward at the same angle.
The mistake of thinking the Smith machine will prevent bad squat form also shows up in people who fail to arch their lower back, and have a rounded upper back. Proper form is very important even for tracked barbell devices.
The fifth mistake that’s made with the Smith machine when it comes to squatting is assuming that this contraption is worthless, and that only free barbell routines will produce any results.
I’ve seen mighty strong men using tracked barbell equipment; it has its virtues, especially for people who don’t have spotters.
Because the equipment helps stabilize the user, the user can use heavier weights.
 Lorra Garrick is a former personal trainer certified through the American Council on Exercise. At Bally Total Fitness she trained women and men of all ages for fat loss, muscle building, fitness and improved health.
.
Top image: Freepik.com, senivpetro

Afraid To Squat with a Barbell? Tips to Overcome Fear

Fear of the barbell squat can affect men as well as women.
When I was a personal trainer at a gym, I had clients who were “afraid” to barbell squat, though “fear” isn’t exactly the right word to use; it’s not as though the weight might bite back.
However, some women (and men) just don’t want to get under a weight or have a weight across their back.
There are very easy ways to get past your fear of squatting with a barbell.
There are two kinds of barbell squats: Smith machine (or tracked barbell) and free barbell.
The Smith machine. Freepik.com
Some people who are nervous about the free version may not even realize that a tracked version exists.
These would be novices who have not spent much time in a gym, or if they have, have not ventured anywhere near the tracked device to know it exists.
However, even the tracked device can be “intimidating” to beginners who have never squatted with a barbell.
To overcome being afraid to barbell squat, simply get your legs conditioned by doing body weight squats.
Stand before a mirror and get going. This will strengthen your abilities. Go for 20 repetitions. Practice good form, even though you’re only using body weight.
Good Form
Both feet are flat on the floor at all times; feet are about shoulder width apart, though wider is okay; feet are aligned; feet are pointed straight ahead or slightly outward, though experienced people may turn their feet even more outward to target inner thighs.
The lower back is arched; chest is “puffed out” or “big.” You’re looking straight ahead or slightly upward.
Don’t go beyond thighs parallel to the floor, though more advanced folks sometimes do this.
When straightening up from the squat, don’t lock out the knees but instead, keep them “soft” or just a hair less than straight.
Once you have solid form down, the barbell squat will be less intimidating, especially as your legs get stronger from the body weight version.

Good form. Shutterstock/Reshetnikov_art
Once you get comfortable with the body weight version, hold dumbbells in each hand, arms straight at sides, and go again.
You can also place feet on air cushions to create instability while performing the exercise.
This will force your body to adapt and become more efficient with squatting motions. You can also do the exercise atop the round portion of a BOSU board.
Another way to overcome fear of the barbell squat is to place the gym’s lightest barbell across your upper back. Never place the weight across your neck, never.
The lightest barbell may be 20 pounds; this is very light for a squat. Place the weight on the floor and have a seat before it.
Pick it up and raise it above your head, then settle it behind yourself, on your upper back. Then stand and begin squatting.
You can stand over the seat and perform the repetitions with the seat under you if you’re still a bit afraid or nervous, or, you can step away from the seat and do the exercise without the seat under you.
You are now doing free barbell squats, though with a very light weight. As you become more at ease, use a heavier weight. Work up from that point.
Pre-weighted barbells are a lot shorter than the Olympic barbells, and are thus less “intimidating.”
When using an Olympic barbell (unloaded it weighs 45 pounds), use a squat rack always.
The rack has features that prevent you from falling all the way to the floor with the barbell should your legs give out.
To diminish that “afraid” feeling, have an experienced person stand behind you while you perform barbell squats.
You can also use the Smith machine or tracked device, which eliminates some of the balance required of free barbell squats.
Squatting apparatus is universally placed before mirrors so that you can check your form.
Make sure you are evenly under the weight, rather than more to one side than the other.
Hire a personal trainer to assist with your fear of barbell squats. Don’t rely on watching other people doing the exercise because their form might be wrong, even if they are big bruisers or have enviable legs.
If you’re short on money, realize that you can hire a personal trainer for just one or two sessions; doesn’t have to be a full training package.
Lorra Garrick is a former personal trainer certified through the American Council on Exercise. At Bally Total Fitness she trained women and men of all ages for fat loss, muscle building, fitness and improved health.
.
Top image: Shutterstock/Jasminko Ibrakovic

Cable Crunches: How to Do Them Right for Toning, Trimming Abs

Cable crunches are often done wrong. Instead of actually crunching, people bow to a statue. This will not deliver the results they want.
“The abs do not get worked this way,” I’d tell people at the gym where I worked as a personal trainer some years ago.
Cable crunches trim the abdominal area by causing the muscles to tighten and “compress.” The result is that the area “caves in” a little; creating definition and literally, a smaller waistline.
When people do cable crunches, their objective is to hit the abs hard. What many don’t realize is that instead of targeting the abdominals, they are hitting mostly the lower back by doing the cable crunches incorrectly.
You want to target the abs, not the lower back. Here are the classic mistakes that people make with the cable crunch:
Instead of crunching (curling trunk inward), people instead lower down by using their lower back, with very little crunching motion at the abs.
- They sit on their heels as they lower; butt atop heels. This takes load off the abs, when you should be loading the abs.
- Their arms yank at the rope or whatever pulling device they’re using. I use only the rope; it’s the best device for cable crunches. If you pull on the rope, you take work away from the abs.
- The last mistake with cable crunches is using so much weight that the person is not able to do curl in a full range of motion with the abs.
Think of the cable crunch as an inverted crunch. When you do a typical crunch, your trunk folds up and your head comes towards thighs. So when you do cable crunches, this same motion should be happening: back flexion.
Merely bobbing up and down from a lower-back pivotal point will not target the abs.
Only your lower back gets the workout. This is a common mistake with cable crunches: The person keeps back straight while bouncing up and down from the lower back.
When you perform cable crunches while sitting on your heels, this sabotages best effort at curling in the trunk and abs.
Again, think of a regular crunch. Regular ones are often performed with legs positioned up in the air, thighs vertical, and calves horizontal: a 90-degree bend. So when you do cable crunches, duplicate this position.
Thighs should form a 90-degree angle with calves. Do not sit back on legs.
To avoid getting arms involved, they must be firmly against sides of head. This way, they integrate with your head, and become part of the weight you are pulling.
Many people make the mistake of pulling the weight down with their hands, yanking with forearms and shoulders, fooling themselves into thinking their abs are doing this work.
Using too much weight will prevent you from using correct form. If the weight is heavy enough, you will not be able to curl your trunk/abs in as tightly as possible. For best results with the cable crunch, your rep range should be 20-35.
How to do a cable crunch: step-by-step (video follows):

Set weight a lot lighter than usual. For men, I recommend 100-120 pounds. For women, 80-100.
Do not assume this is too light, because when you bring proper form and 20-35 reps into the picture, this much-lighter weight will be challenging.
Use the rope for the hand device, and hold it just above the knobs or knots.
Grab rope while standing, then get to knees.
Determine where knees should be on the floor (use a mat), so that if you were to bend forward at the pelvis, your head will have room to come down without grazing the weight stack.
Set yourself up in the start-position: upper legs vertical, forming 90-degree angle with lower legs.
Maintain this angle throughout the entire cable crunch set.
While holding rope, place inside of forearms tightly against ears. Forearms should be parallel to each other.
Your back is parallel to floor in this start-position, though it should have a slight arch.
Now, without losing that 90-degree angle with your legs, curl trunk as though you want to touch elbows to thighs.
If elbows hit the floor, you are not cable crunching correctly.
However, elbows will probably not make it to your thighs. This is normal.
As long as elbows are on track to meet thighs, you know you are cable crunching properly.
As you progress into the curl, round out the back. If you keep it arched, you’ll have difficulty with form.
For cable crunches, you will be arching low back (when you uncurl), and then rounding (when you curl).
However, back pretty much stays parallel to the floor, within the range of the arching and curling.
If your back strays a little from parallel, meaning, upward — that’s fine as long as everything else is in place. But make sure you don’t allow momentum from the release to propel your back too much upright.
At some point, you will not be able to go further because your abs will begin fatiguing.
At this point, force a few more inches into the crunch. Then hold it there for two seconds.
Release the crunch and return to the start position, with back slightly arched. Repeat the motion for another cable crunch.
If you do this correctly, without any cheating or veering from form, your abs will start burning between 20 and 35 reps.
Rest one minute, then repeat for two more sets, 2-3 times per week. Other protocols will work as well; whatever fits best into your schedule.
Cable crunches are the best way to get abdominal definition and take an inch off the abdominal area, in the way I explained previously.
Cable crunches will NOT burn fat. They “compress” or reduce the abdominal circumference by working the muscle. Fat loss has nothing to do with this process.
So if you have excess fat in your abs, the effects of cable crunching won’t show as much.
I’ve had overweight clients who actually developed abdominal definition from cable crunches, but the fat was still there.
However, a fatty midsection with definition looks far better than a fatty midsection with NO definition.
Lorra Garrick is a former personal trainer certified through the American Council on Exercise. At Bally Total Fitness she trained women and men of all ages for fat loss, muscle building, fitness and improved health.
.
Images: Everkinetic.com

How Painful Is Surgical Mole Removal?

Surgical mole removal is not painful at all. At least, it wasn’t painful for me, and I have had six moles removed surgically.
But I’ve had this procedure done six times now, to remove moles, and there is no pain.
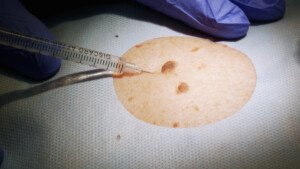
You will feel the needle insert into your skin. It is less painful than a paper cut. In fact, sometimes paper cuts can hurt like $#$#!
Having a mole removed is also a lot less painful than undergoing facial extractions.
Any woman who’s had a facial knows how biting painful the extraction process is on the nose.
One of the moles I had removed was on my cheek, and I’m not even sure I ever felt the needle for the anesthetic.
Once the area is numbed, you absolutely cannot feel the doctor surgically remove the mole.
The first spot I had taken out was about 4 and a half millimeters in diameter, and that’s why I wanted it removed, since I had been reading that moles over 4 mm should be removed, since they are more likely than tiny ones to ever turn into melanoma.
It was on my lower abdomen. I was lying on my back during the procedure, and after feeling just a hint of a needle for a very brief moment, never felt anything after that.
Shutterstock/Diedov Denys
The removal procedure was a diamond-shaped incision that included a margin of skin around the spot.
The recovery of this mole removal was also painless.
All you do is change the bandage every day and clean the area every day.
The stitches can be removed by the patient after 7-10 days, depending on location of the incision.
The second mole I had removed was on my cheek, and again, no pain, just the sensation of the needle penetrating the skin.
Just because you can feel this happening, doesn’t mean it will be painful, like a facial extraction, paper cut or someone deliberately jabbing a sewing needle into your cheek.
The removal procedure for this mole was a “punch” procedure.
The instrument, that’s shaped like a tiny cylinder, is placed over the mole.
The instrument’s diameter is bigger than the mole, to allow for a margin of skin around the spot to be removed.
The instrument is then “punched” through the skin, to also collect a margin of skin underneath the spot.
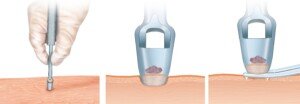
Punch biopsy. Shutterstock/ilusmedical
Again, recovery is pain free and involves keeping the area covered with a Band-Aid for a week, changing the Band-Aid daily (and putting Vaseline on the Band-Aid). I removed the stitches myself after seven days.
I had the cheek mole removed because the top layer was quickly flaking off, but it turned out to be benign.
Shave Procedure
The third and fourth moles I had removed were on my back and shoulder, and involved a “shave” procedure, which isn’t as invasive as the punch or diamond incision.
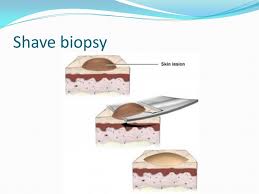
The shave is just that; the spot is shaved off the skin, but the shave includes a margin of skin around and beneath the mole.
I had these two removed electively because I wanted to “de-mole” myself, figuring that this would reduce my chances of ever getting melanoma.
The fifth spot removed actually wasn’t a mole; it was a seborrheic keratosis, on my back.
But I had thought it was a mole (the doctor said it looked more like a seborrheic keratosis, but because it was changing in appearance, I insisted she use the “punch” procedure to get it all out).
The punch procedure is just as painless as the shave. The stitches had to be removed 7-10 days later.
Stitch removal is painless, and the only reason I had to have a doctor do it was because it was on my back.
The sixth mole removed was actually a lentigo (sunspot), but the procedure is the same, and in this case, it was a shave.
Sometimes, lentigos are indistinguishable from moles, and even a dermatologist cannot tell the difference.
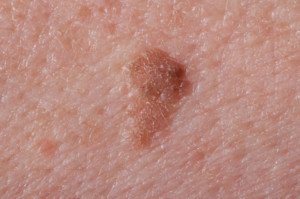
Lentigo. Shutterstock/Roblan
The only way to tell one tissue type from the other is under a microscope.
I had this lentigo removed because it went from brown to reddish-brown in only a few days.
A lentigo can turn into melanoma. Mine, however, turned out to be benign, despite changing colors.
Because the lentigo was on the front of my lower leg, I was able to observe the entire procedure.
The shave involves a tiny instrument with a curved razor. The doctor places it beside the mole/spot and simply glides it across the skin.
The curvature picks up the mole, along with a margin of skin beneath it.
Mole removal at home has one major disadvantage:
You can’t get the spot biopsied.
Whenever you have a mole or spot removed, it should always be biopsied, no matter how normal it looks.
This means if you want a spot removed for vanity reasons, it still should get biopsied!
I read about a young woman who had a large mole on her shoulder taken off, and the doctor tossed it into the rubbish.
A few years later the area of removal began itching.
The doctor had failed to remove every last bit of the mole; what remained had morphed into melanoma.
In fact, at the time of the removal, it’s possible that the melanoma was already in progress, though asymptomatic.
The woman ended up dying because the melanoma cells had spread.
Forget pain; if you want a mole removed, have a dermatologist do it, and request a biopsy.
Lorra Garrick has been covering medical, fitness and cybersecurity topics for many years, having written thousands of articles for print magazines and websites, including as a ghostwriter. She’s also a former ACE-certified personal trainer.
Top image: Shutterstock/Pixel-Shot
Itchy Bumps on Back of Scalp: Causes and Solutions
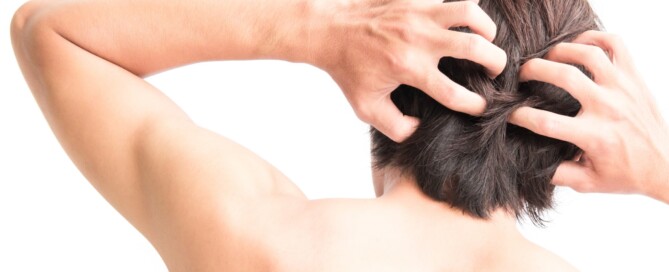
Itchy bumps on the back of your scalp have a specific cause, and thus, a specific solution.
“Itchy bumps on the back of the scalp, called seborrheic folliculitis, are usually a deeper manifestation of ordinary dandruff,” says Neal Schultz, MD, a dermatologist with a private practice in the NYC area, and founder of dermTV.com.
“But instead of it being on the surface of the scalp, it is deep in the hair follicle/oil gland and therefore actually causes bumps which are itchy, and then become crusty both by themselves (as part of the skin’s inflammatory response to the entrapped oil), and also as a result of being scratched, which also causes inflammation.”
The term seborrheic refers to the sebaceous glands, which are the oil glands at issue here. Seborrheic folliculitis is an inflammatory process.
Inflammation means that histamine is released, and this causes the itching. And then you start scratching…
Dr. Schultz explains, “Scratching creates an itch-scratch cycle in which scratching causes inflammation in the skin and a release of histamine which causes more itching, so there’s more scratching and you’re then in an itch-scratch cycle where the itching begets more scratching, and the scratching begets more itching.”
Those itchy bumps on the back of your scalp are on the dandruff continuum, but further down.
The overproduction and entrapment of oil (from the sebaceous glands) in the skin causes dandruff, says Dr. Schultz.
He says to think of the oil as a foreign body, much like a splinter in the skin, with the skin then reacting to this irritant by becoming inflamed, swelling up, to get rid of this invader.
This reactive process causes the flaking (and sometimes redness) that you know as dandruff.
So your scalp (or any other part of your body where this may occur on the skin surface) not only itches, but it has something to show for it: sometimes bumps, or redness, and of course, flaking.
The flaking is caused by the premature shedding of skin cells.
Dr. Schultz explains, “When skin cells fall off at the normal time, they have time to dis-attach from each other, and as individual cells are so small you can’t see them with your naked eye.
But when they fall off prematurely before they have a chance to dis-attach from surrounding skin cells, they fall off as sheets of cells which we see as flakes.”
When this process occurs just at the skin surface, you see dandruff but no bumps on the scalp.
“But when that occurs deeper in the follicle, instead of just flaking red skin, seen in ordinary surface dandruff, you get the actual itchy bumps because there is more inflammation, causing more swelling, hence bumps, which are often crusty and very itchy.
“Itchy because of our friend histamine….whenever there is inflammation, histamine is released and the itching begins.”
What can you do about itchy bumps on the back of your scalp? Dr. Schultz recommends medicated shampoos with one of these active ingredients: salicylic acid, tar, zinc or selenium sulfide. He prefers the ingredients of salicylic acid and tar.
Additionally, says Dr. Schultz, a dermatologist can prescribe a topical cortisone solution to help reduce inflammation and get rid of the itchy bumps on your scalp (or elsewhere).
 Dr. Schultz has been treating his patients’ dermatologic conditions for 30+ years, with particular emphasis in skin cancer prevention and treatment, acne treatment and laser surgery.
Lorra Garrick has been covering medical, fitness and cybersecurity topics for many years, having written thousands of articles for print magazines and websites, including as a ghostwriter. She’s also a former ACE-certified personal trainer.
.
Top image: Shutterstock/MRAORAOR
Can You Pick Off Melanoma, How Much & Will it Spread
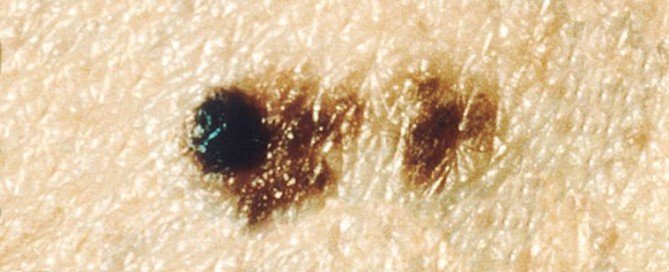
The questions should be how much melanoma can you pick off, and will picking at a melanoma make it spread?
This deadliest of skin cancers doesn’t just grow on the skin surface, but below it.
“It is the remaining portion in and below the surface of the skin that has the potential to spread, and do what melanoma tragically does so often, which is kill people,” says Neal Schultz, MD, a dermatologist with a private practice in the NYC area, and founder of dermTV.com.
The disease kills about 10,000 Americans every year, yet it is perhaps the most curable form of cancer when caught early enough.
So how much of a melanoma can you deliberately pick off?
Well, if you go deep enough, says Dr. Schultz, you “may in fact remove the entire thing, and if it was only a ‘suspicious’ or abnormal, meaning (benign) precancerous mole, then that (precancerous) mole no longer has the ability to cause a melanoma, and the person has succeeded in permanently removing the threat of it becoming a melanoma.”
However, this never validates picking at what you suspect is melanoma.
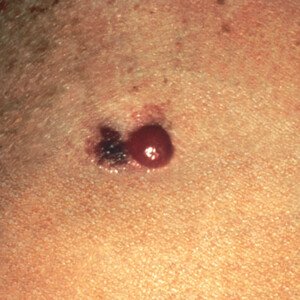
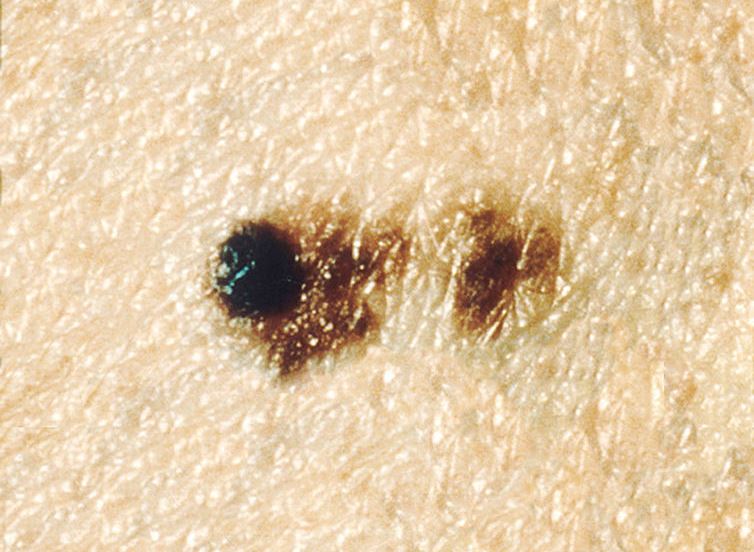
Advanced melanoma. Cancer.gov
“The problem is that there is no way of knowing without examining the specimen with a microscope, whether it’s been removed completely.”
“And if it hasn’t, then it’s even worse because the surface can heal (so there is no visible mole tissue), and the remaining abnormal mole (invisibly under the surface of the skin) continues to grow under the skin,” explains Dr. Schultz.
“And can turn into melanoma and remain undetected until it has invaded deep into the skin, which when it reaches blood or lymph vessels is how it spreads (metastasizes), which is what kills people.”
The first sites that this cancer tends to spread to are the lungs and brain.
Five-year survival rate for this disease at stage IV is 15-20 percent
10-year survival rate is 10-15 percent.
Dr. Schultz continues, “As a dermatologist who specializes in the early detection, prevention and treatment of skin cancer and especially abnormal moles and melanoma, when I examine patients and think a mole is suspicious, and I put in anesthesia and use my surgical skills to remove it, about 10 percent of the time even I don’t remove the entire abnormal mole.
“Because it had microscopic tentacles either under the skin or in the skin surrounding the visible part of the mole, not visible to the eye, which are only microscopic and that extend beyond the limits of the removal.”

Cancer cell. Shutterstock/Lightspring
Dr. Schultz knows that 10 percent of the time his excision doesn’t get the tentacles because the lab report comes back with this information.
Of course, in the case of compete removals, the lab indicates this too; a complete removal of a precancerous mole means that there’s nothing left to turn into skin cancer.
But can picking at a melanoma make it spread, then?
“If you try to pick off a melanoma, and in fact only remove part of it so that you have actually cut through the melanoma, that cannot make it spread,” says Dr. Schultz.
“Similarly, if a surgeon cuts through a melanoma in the process of removing it, that cannot make it spread.
“That has been established and proven in peer review published medical studies.”
Nevertheless, don’t pick at that thing on your skin that you fear might be melanoma just because you now know that this won’t make it spread.
Dr. Schultz adds, “By the time a melanoma is raised enough for you to ‘pick off’ a part that is sticking up, it is already advanced and may have penetrated deep enough into the skin to spread, since there is a direct relationship between how raised or elevated a melanoma is and how thick (deep) it is under the skin.”
So though you yourself can’t make melanoma spread by picking at it or removing some of it with your fingernail, tweezers or razor blade, the fact that it’s elevated enough for you to do this means that it may have already spread into nearby lymph nodes.
You cannot regress the already-spread status of a melanoma by picking at just the tip of the iceberg.
If any spots on your skin have you worried, see a dermatologist, even if you don’t have medical coverage.
The 10-year survival rate for this type of skin cancer is near 100 percent when caught at stage zero.
If you have many moles, consider a cutting-edge screening tool known as serial digital dermoscopy.
If this article provided you with helpful information or reassurance, please consider supporting my work through Ko-fi. Donations help me continue writing detailed medical content that’s easy to understand.
Dr. Schultz has been treating his patients’ dermatologic conditions for 30+ years, with particular emphasis in skin cancer prevention and treatment, acne treatment and laser surgery.
Lorra Garrick has been covering medical, fitness and cybersecurity topics for many years, having written thousands of articles for print magazines and websites, including as a ghostwriter. She’s also a former ACE-certified personal trainer.
.
Source:
cancer.org/Cancer/SkinCancer-Melanoma/DetailedGuide/melanoma-skin-cancer-survival-rates

Benign Mole Removal: My Experience

Ever thought of having mole removal?
I’ve had mole removal twice for benign moles. The first mole was on my abdomen and measured four and a half millimeters in diameter.
I had surgical mole removal because I had read it was a good idea to have moles at least this size removed, since a large mole is more likely to become melanoma (skin cancer) than is a small mole.
I had a second mole removal recently because I thought the mole could be melanoma.
I thought it was melanoma because the mole’s top layer flaked off over a period of what I had extrapolated to be two to three weeks.
I noticed the flaking-off only when a little more than half the mole’s top portion had already disappeared.
Over the next five days, the mole’s remaining top portion disappeared. Thinking melanoma, I got an appointment for mole removal. In both cases, the doctor (dermatologist) anesthetized the area.
With the first mole removal, the doctor made an incision around the mole in the shape of an elongated diamond, then scooped out this surrounding skin, along with the mole, and including some skin tissue beneath it; this is a safety margin, just in case there’s skin cancer.
Though this mole looked perfectly normal, a doctor should always cut out a margin of skin surrounding the mole, depth-wise and laterally.
A doctor should also send the tissue to pathology for biopsy, even if the mole appears normal (my biopsy came back normal).
This happened too long ago for me to remember if the stitches were dissolvable or if I had to return to have them removed.
I do remember wearing a bandage for a week. Over the years the scar has faded significantly.
The mole on my face was removed with a “punch.”
The doctor showed me the tool for this; its diameter was bigger than the mole, which meant that skin surrounding it laterally would be removed, and skin beneath it (depth) would also be punched out. These punch tools come in varying diameters.
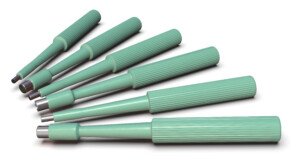
Shutterstock/Peter Sobolev
The first mole removal, if my memory serves me correctly, took 30-40 minutes, though I could be wrong. The second mole removal must have lasted about 7-8 minutes. It’s painless.
In fact, a blackhead extraction on one’s nose is far more painful than a mole removal.
Administration of the anesthetic feels like a dull pin pressing along the skin.
The biggest problem I’ve had with this second mole removal is the allergic reaction to the Band-Aid — not of the incised area itself, but the nearby skin that the Band-Aid’s flaps have made contact with.
The nurse supplied the initial Band-Aid and said they were latex-free, but they didn’t say hypoallergenic on them. I took the chance and used these
Band-Aids (she gave me six) for the first five days following the mole removal, knowing I was allergic to Band-Aids, but figuring “latex free” wouldn’t cause any problems.
Well, they did. The nurse’s instructions were to change the Band-Aid every morning after gently cleansing the incision with water and then applying Vaseline (which she gave me) to the incision.
The incision was closed with dissolvable stitches, and the surrounding skin has a “pulling” lumpy appearance. The nurse said this was normal.
It’s six days out as I write this content, and the incision is healing, the stitches are dissolving, and the surrounding skin is slightly discolored, slightly swollen.
The skin where the Band-Aids were is red, cobbled and irritated; yesterday I purchased hypoallergenic Band-Aids.
I have concealed this irritated area with concealer so that my parents don’t suspect anything wrong. They do not know I had a mole removed.
They had asked why I had a Band-Aid there for several days, and I told them I had accidentally gouged the area with my thumb nail when proceeding to brush back my hair with my fingers.
There will be a scar there for some time, and I’m sure it will fade over time. But quite honestly, I don’t care. The scar will be very small and easily concealed with makeup anyways.
I’m not the type of woman who’s going to be self-conscious of a tiny mark on my face.
As long as I no longer have to worry about a mole on my face becoming melanoma, who cares about some tiny little scar?
Lorra Garrick has been covering medical, fitness and cybersecurity topics for many years, having written thousands of articles for print magazines and websites, including as a ghostwriter. She’s also a former ACE-certified personal trainer.
Top image: Shutterstock/ivan_kislitsin






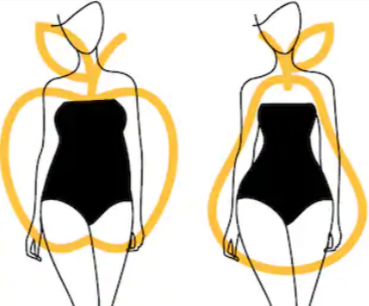
How to Change Body Type: Pear Shaped, Apple Shaped
It’s a myth that you can’t change your apple or pear shaped “body type.”
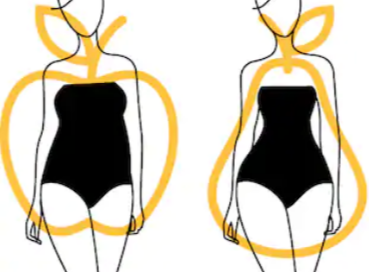
If you’re pear shaped or apple shaped, you can change this “body type.”
Even though the pear shape or apple shape “body type” has been linked to certain chemicals in the body, this doesn’t mean that you cannot change this “shape.”
Compelling research comes from the University of Edinburgh, linking higher presence of the protein 11BetaHSD1 to the apple shaped body type, versus the pear shaped.
More of this protein is stored in midsection body fat. The fat that’s stored in the hips and thighs is considered to be a healthier form of fat and has lower levels of this protein.
The next step is for researchers to develop a drug that inhibits the protein. (more about the research in Diabetes, 2011.)
If you’re apple shaped, this is not healthy, as excess abdominal fat means excess fat around vital organs. In a pear shape, excess fat is around muscle.
Just because the pear shape isn’t as unhealthy as the apple shape, doesn’t mean that the pear shape is a satisfactory state of the human body.
In both cases, a person has excess fat. The solution is to force the body to burn this excess fat. Think of this excess fat, be it in your middle or hips/thighs, as untapped energy.
If you’re already exercising, it obviously isn’t sufficient enough to force your body to burn up this untapped energy (fat).
I rarely see a pear shaped, overweight woman doing strenuous weight routines, and have never seen a pear shaped woman doing high intensity interval training.
Same for apple shaped women. I’ve seen a few pear shaped men doing regular cardio and run-of-the-mill weight workouts.
And most apple shaped men do not hang in the gym’s free weight area.
The pear and apple shape do not prevent a person from performing intense weight routines or high intensity interval training.
So what’s going on?
It’s simple: If you have the pear or apple shape “body type,” and don’t do intense weightlifting or high intensity interval training, you will continue to have your particular “body type.”
And I keep quoting body type because it’s not quite accurate to refer to it as that, because it doesn’t have to be permanent.
The tendency that one’s body has for a particular fat distribution is not set in stone.
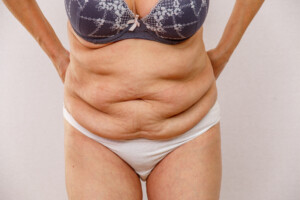
Research (e.g., Epel et al) shows that when a person has excess abdominal fat, it’s linked to the stress hormone cortisol, which promotes fat storage in the midsection!
Shutterstock/A.J.Photos
Chronic mental stress in the absence of strenuous exercise will likely lead to this condition.
A woman (or man) under chronic stress, who regularly exercises, may still suffer from a stubborn apple shape – because the exercise isn’t intense enough!
Mild exercise produces no hormonal effect. Moderate exercise raises production of cortisol.
Intense exercise also raises production of cortisol. However … intense exercise also raises production of lactic acid, testosterone (yes, in women), and human growth hormone (e.g., Kraemer et al).
These three hormones are powerful fat-burners. Furthermore, they counteract the effect of the cortisol that’s being produced! You have, essentially, a cancellation effect of the cortisol.
This is how intense exercise can blast away excess fat in your midsection.
Chronic mental stress raises cortisol levels. Primitive man endured a lot of mental stress (e.g., frequently having to escape from danger or chase after his family’s next meal).
Shutterstock/ Teguh Mujiono
The emotional stress involved with this ancient lifestyle produced a lot of cortisol, but early man promptly executed intense exercise (to fight danger or flee from danger), and this intense exercise counteracted the cortisol!
In modern society, this doesn’t happen. Our emotional stress comes from the workplace, where we are forced to sit and stay still.
It comes from waiting in the dentist’s or doctor’s office, waiting in long lines at stores, sitting in traffic jams late for appointments – we are trapped, immobilized, day in and day out, allowing cortisol to run amok in our bodies and promote fat storage in our bellies!
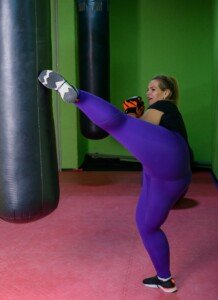
So what can you do? After sitting all day at the workplace under emotional siege … hit the gym, and hard!
Shutterstock/ Reshetnikov_art
Undo all that chronic stress with intense exercise, to drive down the cortisol, and hence, result in burning fat out of your abdominal region.
If you’re pear shaped, do the same thing! Intense exercise will force the body to plunge into fat stored in your thighs and hips.
Excess fat in the thighs and hips is linked to estrogen production, which is why it’s very rare for men to be pear shaped.
Pear and apple shaped women (and men) can drastically alter their “body type” over time with intense weight workouts that include the super fat-burning deadlift exercise, and also high intensity interval training.