
Why Strongman Competitors Are So Tall
There’s more than one reason why strongman competitors are so very tall.
Isn’t it odd that many champion powerlifters aren’t all that tall, yet when it comes to strongman athletes, it’s not uncommon for them to exceed 6’5?
Strongman champions Mike Jenkins and Brian Shaw stand 6-6 and 6-8 tall, respectively.
They aren’t exactly oddballs in this sport, either.Though many strongmen competitors are quite tall, there are exceptions, such as great strongman champion Mariusz Pudzianowski, whose height is listed at six feet or 6-1 (depending on source).
Fitness forums are replete with debates over which height has the advantage in weightlifting, with many tall trainees insisting that their height is an impediment, while many trainees in general believe that being short allows people to lift more weight.
Where are the 5-7 strongman competitors?
There are 12 strongman events:
Atlas stone, axle press, car flip, deadlift, dumbbell press, fingal’s finger, frame carry, keg toss, log press, squat, tire flip, yoke.
Being very tall is a big advantage in the following strongman events:
Atlas stone, car flip, fingal’s finger, keg toss and tire flip. That’s five of 12 events, and some experts would even say that being extra tall is an advantage in the yoke-carry due to fewer strides from longer legs.
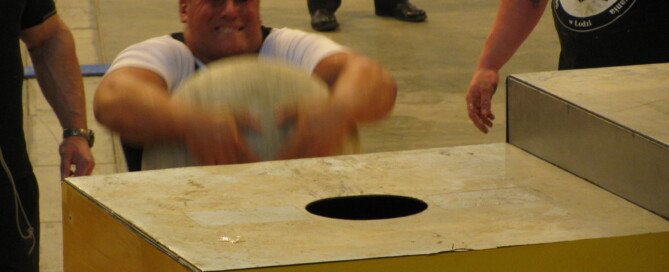
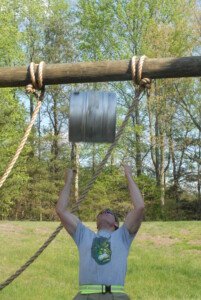
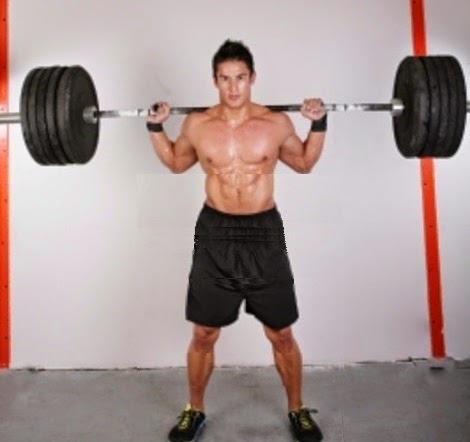
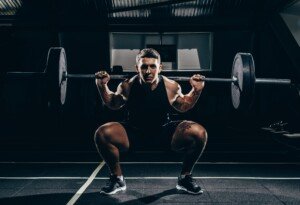
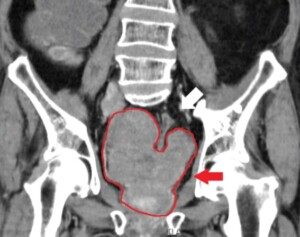
Atlas Stone (top image)
The strongman competitor must pick up several spherical stones, successively placing each one on top of pillars, and each preceding pillar is shorter.
The shorter the strongman is, the more he has to go up on his toes to get the stone on the two highest pillars.
The taller strongman does not need to do as much overhead hoisting; the pillar lineup is the same height for all the athletes.
To make this very clear, imagine that a strongman competitor is only five feet tall.
He’d have to raise the very heavy stone completely over his head with straight arms to get it on top of the highest pillar, and likely on his toes at that.
A seven footer would only have to lift it as high as his neck for the highest pillar, feet flat on the ground.
This doesn’t mean that the very tall strongman is stronger — in the absolute sense — than the shorter man; the issue is biomechanics, not absolute strength.
Furthermore, taller athletes have longer arms; this means more arm to wrap around the stone when picking it up and carrying it to the pillars!
Car Flip and Tire Flip
The taller you are, the less you have to push above head level to knock over the car, and a tall competitor doesn’t need to push as much upward as the shorter man to flip a tire.
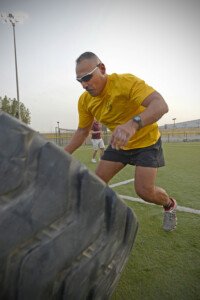
A push that’s closer to horizontal than vertical or upward is easier to do because it involves more chest muscle.
Fingal’s Finger
Being very tall is a major advantage here. On the ground are long, very heavy finger-like cylinders.
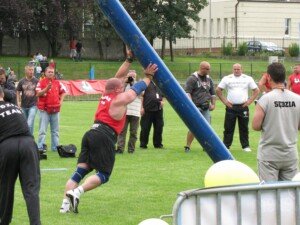
Artur Andrzej, CC
The athlete picks one up at the end and pushes it to a vertical position, then continues pushing it to knock it over.
A short person will have to spend more time pushing it up to vertical. Envision a 3 foot tall man doing this with a 15 foot long finger, then imagine a 10 foot tall man pushing up a 15 foot long finger. The advantage is crystal clear.
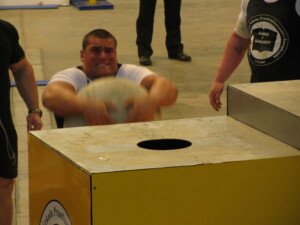
Keg Toss
The taller the strongman, the less distance he needs to toss the keg to get it over a very high bar.
He stands, back facing a very high bar, grabs a keg and (picture the “kettlebell swing”), tosses it up and over his head, high up in the air, to clear the bar.
A 6-8 man has eight inches less of tossing height to contend with than a six-foot-even man.
And there’s more: The taller the athlete, the longer the arms, meaning the greater the torque when tossing.
With a taller frame comes more body weight, which helps out in towing/pulling events.
Now you know why being extra tall is a big advantage for strongman competitors, and that’s why strongman competitors tend to be very tall.
 Lorra Garrick is a former personal trainer certified by the American Council on Exercise. At Bally Total Fitness she trained clients of all ages for fat loss, muscle building, fitness and improved health.
.
Sources: bodybuilding.com/fun/only-the-strongest-mike-jenkins-workout.html; theworldsstrongestman.com/athlete/brian-shaw/; http://violentheropowerlifting.com/index.php?; ption=com_content&view=article&id=334:mariusz-pudzianowski-mma-strongman&catid=3; http://violentheropowerlifting.com/index.php?option=com_content&view=article&id=334:mariusz-pudzianowski-mma-strongman&catid=3
Why People with Intellectual Disability Should Lift Weights

An intellectual disability should be no barrier to lifting weights at a gym.
When I say that people with a mental handicap should lift weights, I’m obviously referring to those who have no medical issues that would contraindicate strength training — and those medical issues would have to be pretty severe, since many “typical” people train with weights despite having an assortment of medical conditions.
Secondly, people with an intellectual handicap would have to have an educable level of cognitive skills to truly benefit from a weightlifting program.
With scores of mentally challenged adults in the workforce, able to hold down a job, why don’t more of them lift weights?
This is because they are rarely encouraged to do so. After all, most of the general population doesn’t even lift weights.
Weightlifting is a Special Olympics event, but those athletes represent an extremely, extremely tiny percentage of people with mental challenges who pump iron.
Another obstacle is that many people, including their family members, believe these men and women are not capable of learning a weightlifting program.
This is really odd, because Special Olympians learn far more difficult activities such as skiing, equestrian, basketball, soccer, figure skating and gymnastics.
Weightlifting IS a Special Olympics sport!
What a fantastic self-esteem booster training with weights would be to someone who’s down on himself or herself for not being “smart.”
When I had a part-time job in Chicago working with mentally handicapped adults, I took one, an obese 24-year-old, to the gym to get her interested in lifting weights.
She had mild mental retardation and had absolutely no trouble duplicating strength training exercises that I first demonstrated.
Unfortunately, she didn’t become hooked. But the point is, she was able to replicate my correct techniques.
At one of the chain gyms I go to, there is a young man with Down syndrome who independently uses both machines and free weights, while his father works out elsewhere in the gym.
Parents of adults with mental challenges need to see the light and realize how invaluable a strength training program would be for their grown kids, or even teenagers.
When I had the part-time jobs in Chicago, I was floored at how miserably out of shape most of the adults with mental retardation were, even though many had high levels of academic functioning.
There is no intellectual barrier as to why a “high functioning” person with an intellectual challenge cannot engage in a full-fledged strength training program for fitness.
In fact, even when they do have behavioral concerns, they can still be excellent candidates for strength training.
One woman comes to mind, “Belinda.” I’d also had a part-time job at a group home where she lived.
At her job, Barbara was responsible as an employee in the daycare center at a health club. At her group home, she acted very childish.
Early every morning before her shift started, she used the health club’s equipment for an hour, unsupervised, and she was not flabby like so many intellectually handicapped adults are.
This goes to show you that even not-so-high functioning mentally challenged adults can still benefit loads from lifting weights.
Lorra Garrick is a former personal trainer certified by the American Council on Exercise. At Bally Total Fitness she trained clients of all ages for fat loss, muscle building, fitness and improved health.
.
Top image: Freepik.com
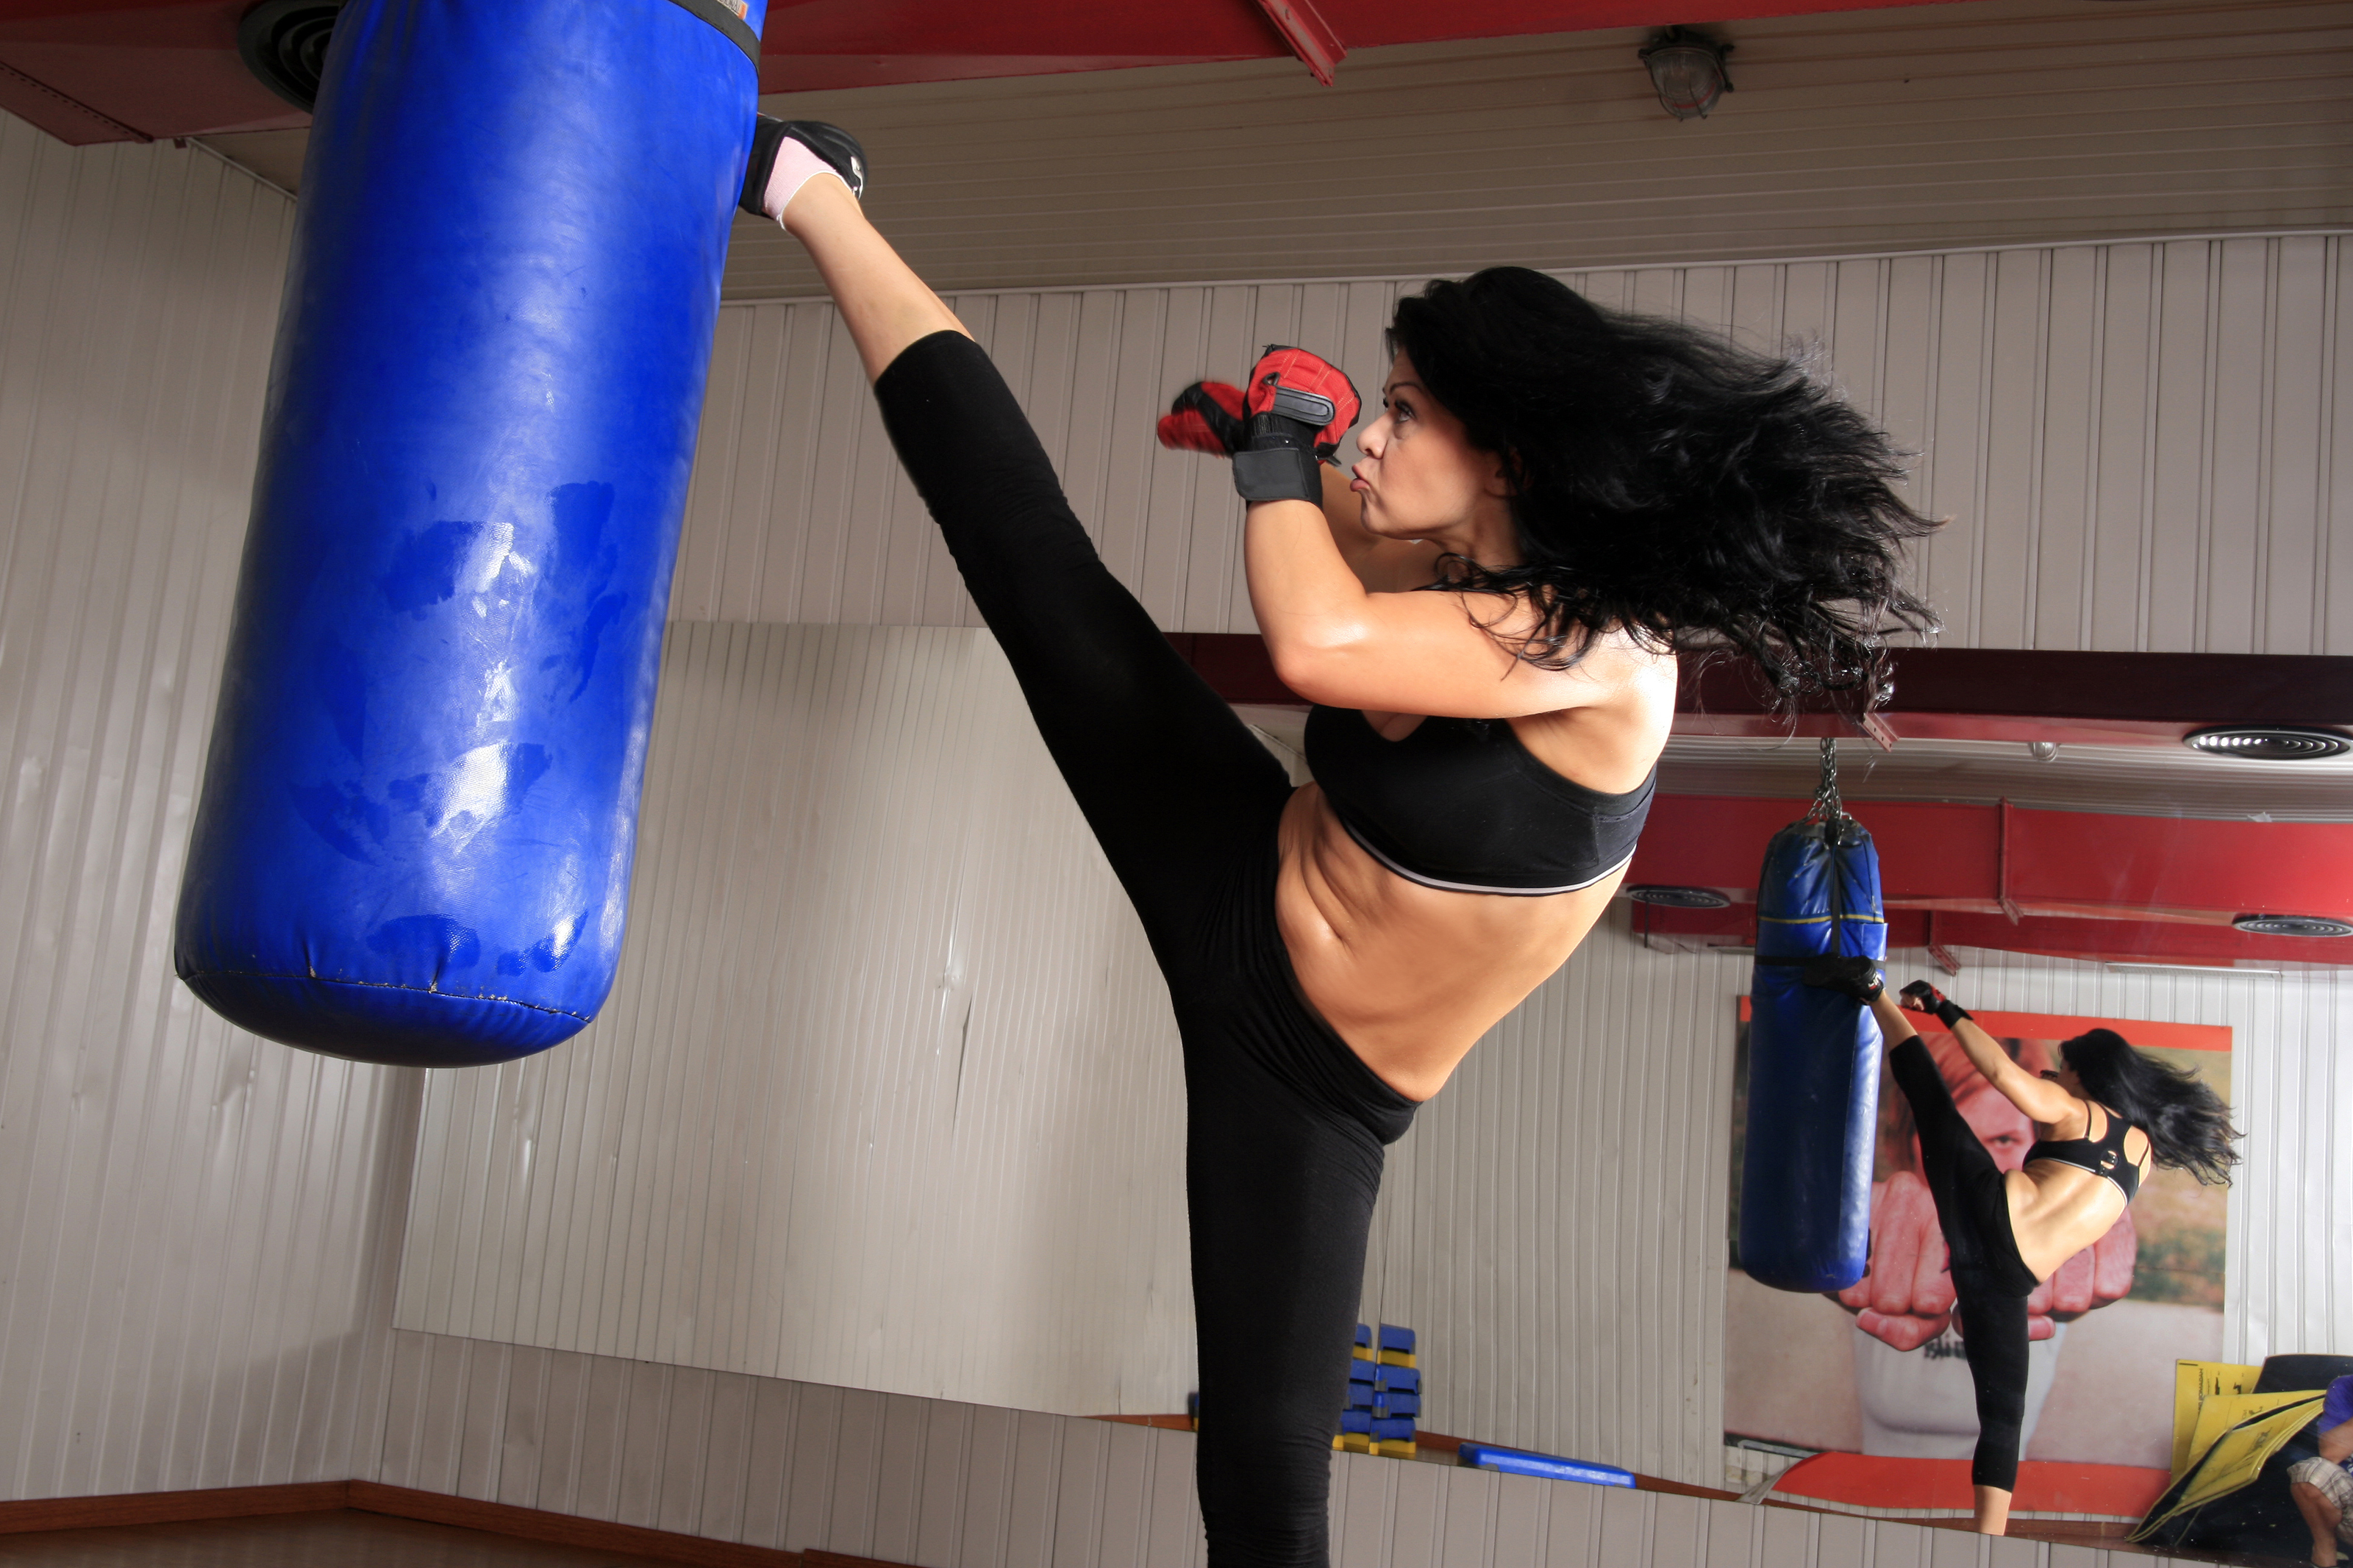
Women with Long Femurs: Back Squat vs. Kicking
If you’re a woman who’s mad that your long femurs make squatting difficult, here’s a reason to embrace those generous thigh bones!
Are you a woman who’s been struggling to pull off a decent squat at the gym, and have realized that the obstacle is your relatively long femurs? I’m a certified personal trainer and have years of martial arts training.
From a biomechanical perspective, relatively long femurs will literally get in the way of a depth squat if you want a decently upright back, and will also make parallel squatting difficult without leaning way forward (unless you use a wide-enough stance).
I have good news for women who tell people, “My squat sucks because of my long femurs.”
The good news is that, while long femurs (meaning, they are lengthier than your torso, regardless of overall body height), are a biomechanical disadvantage in the squat, particularly the back squat, they are a blessing for kicking.
To prepare for kicking, the leg needs to chamber, driven by hip action. Imagine which would generate greater power (especially in a rotational kick like the roundhouse), since the femur is the driving force: long femur chambering from the hip, with little drag from a short tibia, or short femur with all the drag from a long tibia.
Another way to look at this is to imagine a two-foot long plank of wood (this part represents the long femur) with a one-foot long skinner plank (representing the short tibia) attached to its end that can swing about. You whack this contraption as hard as possible into a heavy bag.
Now, take the same device except that the first part of the instrument is only one-foot long (representing the short femur), and the second, thinner portion is two-feet long (long tibia).
Hold the short portion and whack the device into a heavy bag.
Which device generated more power? The first one, of course! Though the longer board with shorter attachment has a greater range of motion as far as extension of angle, than does the shorter board with the lengthier attachment, it also delivers more power.
I was recently viewing an MMA fight online. A man was knocked out cold by a high knee kick to the face.
It’s easy to imagine how much easier it would be to deliver this kind of kick if you had a generous thigh bone.
The guy with short femurs would have to work harder to get his knee up there, if he could even reach his opponent’s face at all.
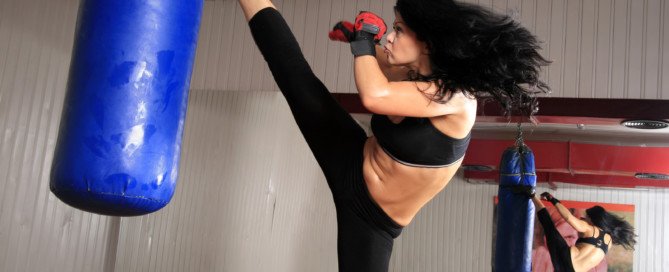
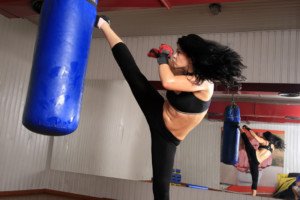
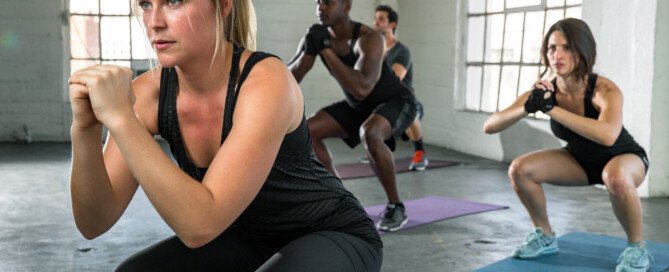
Women and Kicking
Speaking of knee kicks, I doubt any man would want to be kneed in the groin by a knee that’s driven by a long femur versus short thigh.
Women can think of their long femurs as very nasty weapons in a self-defense situation.
Another great kick for women is the roundhouse knee kick. Visualize this kick going at a heavy bag if you’re familiar with this kick, and then visualize it being done with short and long thighs. I needn’t say more.
Women must train faithfully to develop reliable self-defense skills. If a woman delivers a haphazard street kick, femur length won’t matter.
Long femurs are an advantage in the following basic full-leg kicks: front, side, round, hook and axe; and in all knee strikes.
Lorra Garrick is a former personal trainer certified through the American Council on Exercise. At Bally Total Fitness she trained women and men of all ages for fat loss, muscle building, fitness and improved health.
.
Top image: Shutterstock/bg_knight
Women, Short Torso, Long Femur, Sucky Squats?
A smart woman with long femurs relative to torso and/or shin bone length will know this is why the parallel back squat is difficult without a lot forward lean.
The back squat is not the be-all end-all, especially if you don’t want massively muscular thighs.
When I was a personal trainer my female clients wanted attractive, firm and shapely legs.
Assuming you, as a woman, don’t want the largest muscles possible, why would you need to do the back squat, then?
If a woman’s goal is to lift as much as can be, then she should work on the back squat. After all, holding a 100 pound dumbbell in each hand for dumbbell squats is not practical.
But a woman does not need to back squat a 200 pound barbell to get firm, shapely legs or slash body fat.
And besides, when’s the last time you had to lift heavy weight across your back from a squatting position outside the gym environment?
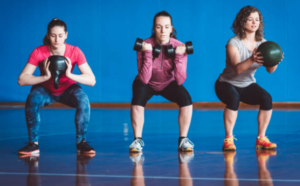
If all you want are a sizzling pair of legs and a loss of body fat, and you have the long femur to short torso issue, then stop struggling with the back squat and focus on these following exercises:
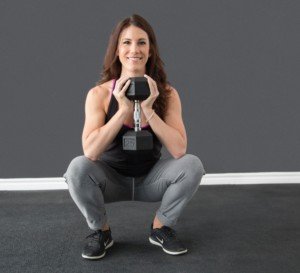
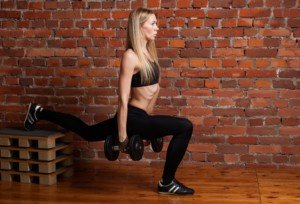
Dumbbell Squat
Split squat
Shutterstock/Artsplav
Stability Ball Squat

George Stepanek, CreativeCommons
Weighted walking lunge
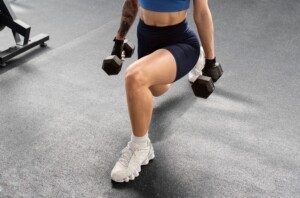
Weighted walking lunge. Freepik
Leg Press
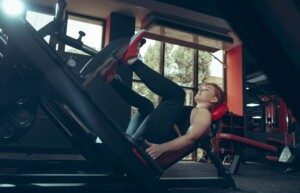
Freepik/master1305
Box Jump
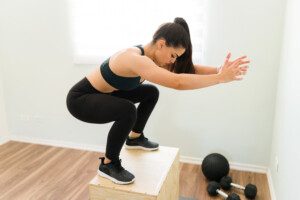
Freepik/tonodiaz
Squat Jump
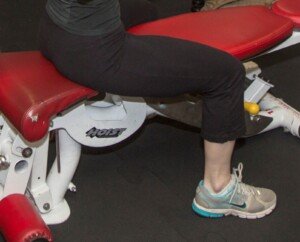
Leg Extension and Hamstring curl
Sprinting
Unless a long femur short torso woman wants to compete in powerlifting or professional bodybuilding (where big thigh muscles are prized) or be seen squatting impressive amounts of barbell weight, there is no logical reason why she must struggle with the back squat.
And remember, the struggling will have a negative effect on the psychology of squatting. You’ll dread it. You won’t have passion for it.
It’s OKAY to admit that your’e not built for squatting due to femurs being too long for your torso and/or relatively short shins.
Focus on developing your prowess with other forms of squatting.
Lorra Garrick is a former personal trainer certified through the American Council on Exercise. At Bally Total Fitness she trained women and men of all ages for fat loss, muscle building, fitness and improved health.
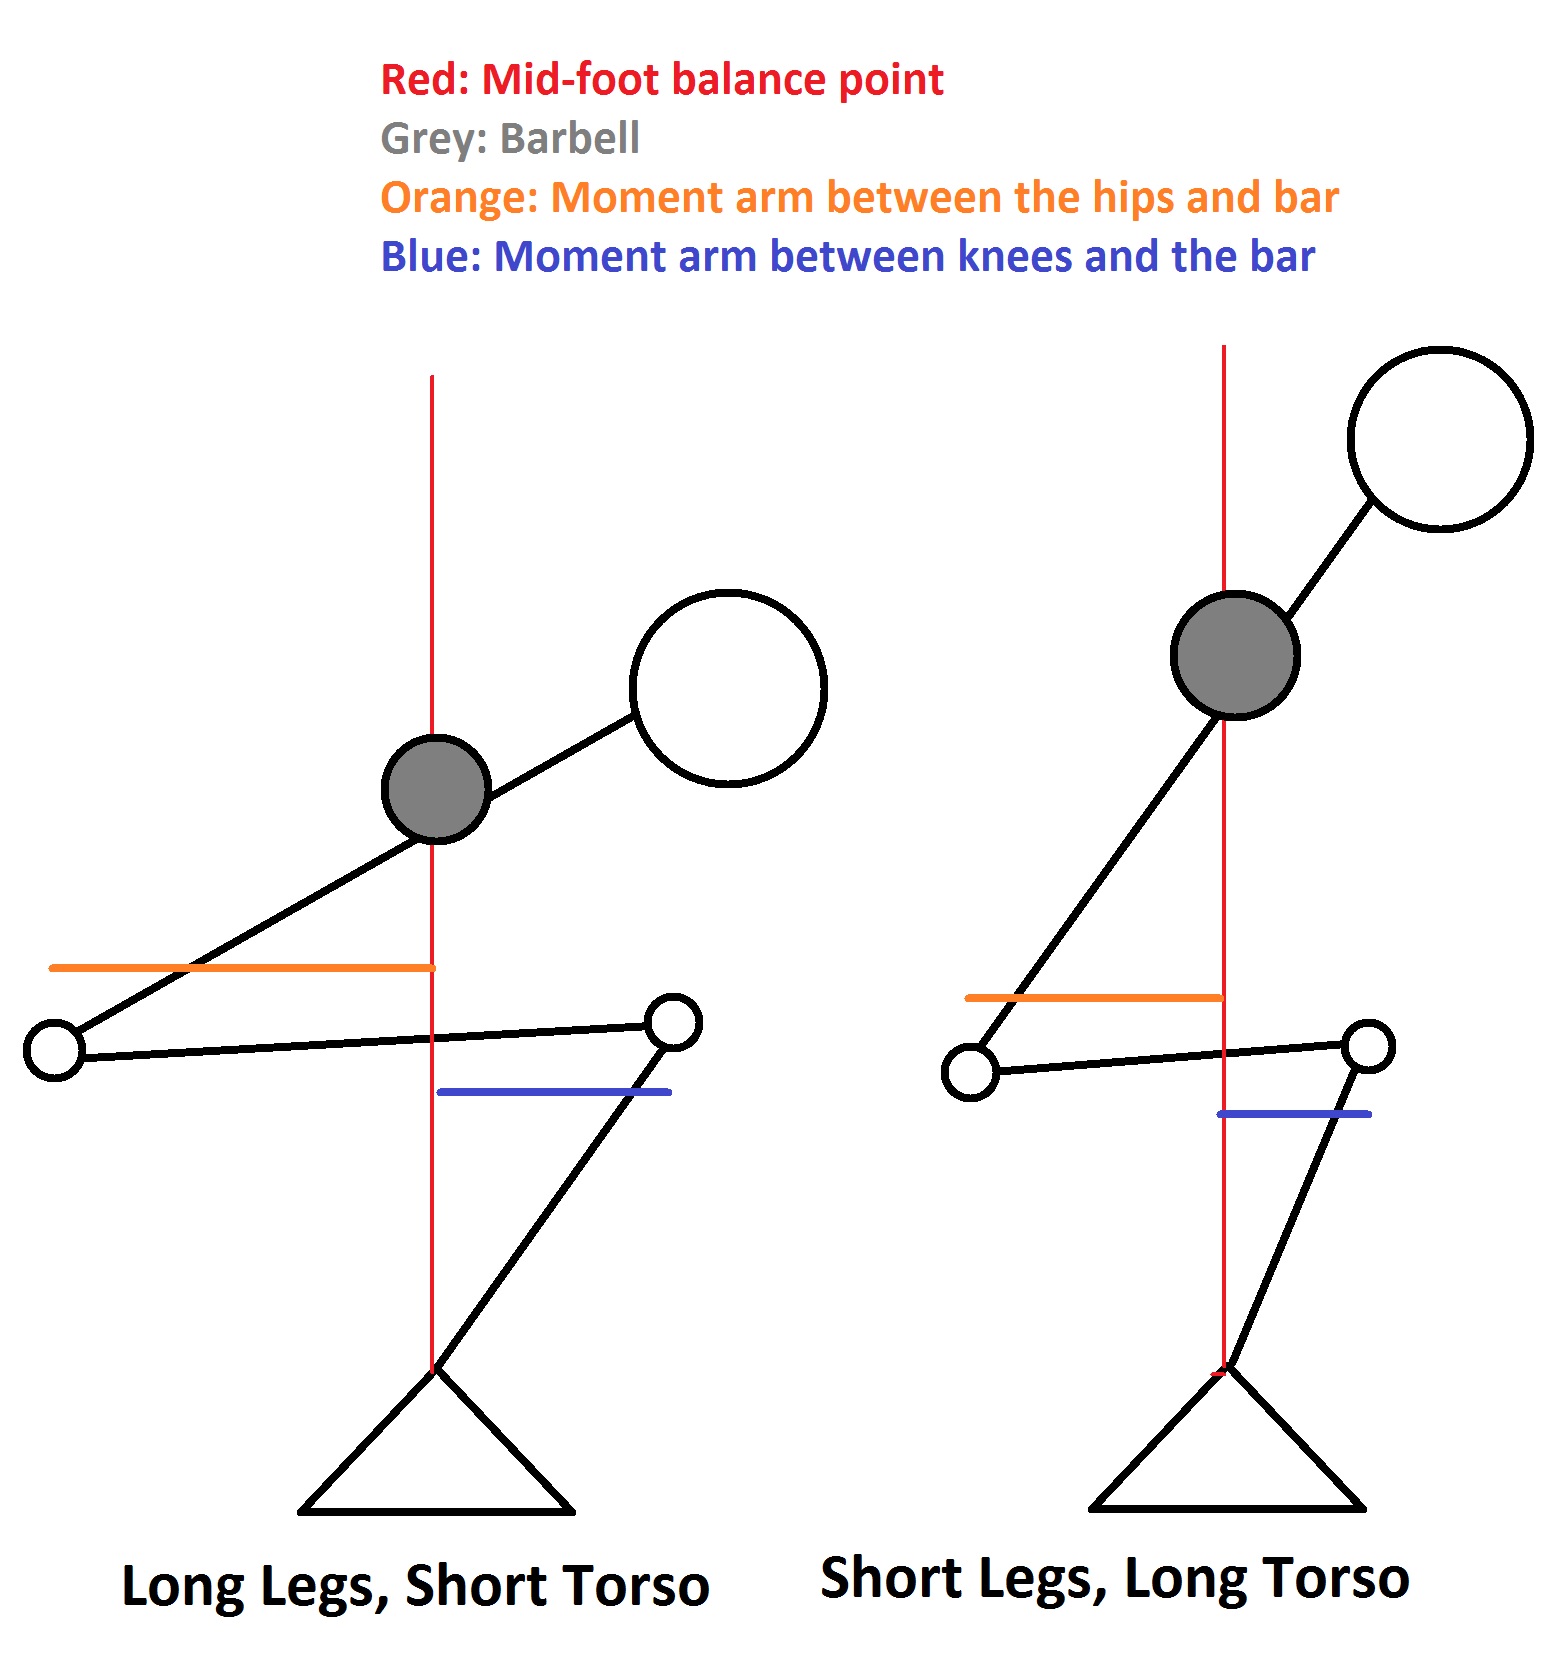
Why the Femur to Torso Ratio in Squatting Is NOT Nonsense
There is solid truth to the claim that a bad femur to torso ratio will make back squats very difficult; learn why this is not a lame excuse!
Are you one of those “bro science” guys who slams some dude in a fitness forum because he blames his back squat problems on long femurs and a short torso?
That’s odd, because it’s Physics 101.
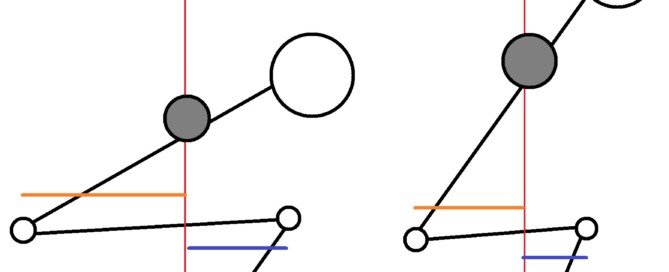
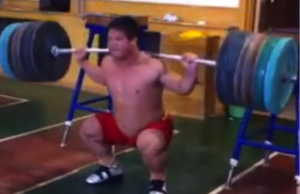
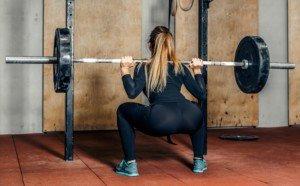
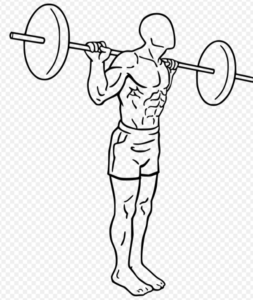
It’s also a matter of halfway-decent vision, when you view the two images below.
The one above shows lousy squat proportions;
in the one below are blessed squat proportions.

Do you really think the guy in the first photo shouldn’t have a much harder time with the back squat, with those relatively long femurs having to go through a greater arc of motion — relative to the shins — to get parallel to the floor?
Imagine him squatting. Then imagine his better-proportioned twin doing the same. Come on now, who’s going to have a real bear of a time here?
And no, the difference isn’t a bigger pair of pants. Look again at the torsos, then the femurs, then the shins.
Short femur athletes know only one thing: What the back squat feels like with short femurs and a long torso (or at least, a torso that’s not shorter than his femurs).
Likewise, the person with the “biomechanical disadvantage” knows only one thing:
That he will fall backwards as he lowers into a half squat, unless he pitches his torso WAY forward — maybe even turning his squat into a good morning.
Though there are those with long femurs and a short torso who actually perform the back squat, you should realize that piling on heavy weights is not a smart idea because their lower back is forced to absorb a lot of tension.

Marvel of nature: Long femurs, short torso, very heavy weight load.
The long femur short torso person who accomplishes a squat does so at a few costs:
1) The lower back is forced to absorb tension that is supposed to be taken up by the glutes and legs, and 2) This type of body may learn to over-dorsiflex the ankles, putting undue stress on the knees.
So even though they can boast, “I have long femurs and a short torso but I can deep squat without rounding my back,” remember those two cost elements.
The lower back muscles (which stabilize the spine) are not designed for force production; the glutes, quads and hams are.
When forces are imposed on them that they are not designed to handle, the risk of a ruptured disk becomes higher, and what becomes even greater is a soft-tissue injury.
A person with short femurs and a long torso is capable of bad form in the squat, but this bad form can be corrected with a little practice.
For those with long femurs and short torso, they do not have the same choices.
Their long femurs throw their hips out so far as they lower into a squat, that to counterbalance this, they must lean their torso way forward.
Try this Experiment
Sit in chair that makes your thighs parallel. How far must you lean forward to get your shoulders over your ankles — while keeping a lower arch in your back? For many of you, it won’t be far; you may be virtually upright yet.
Now, imagine that several inches have been slashed from your torso. This displaces your shoulders back by several inches.
This forces you to lean forward MORE to get your shoulders above the ankles! The shorter your torso, the more you have to lean forward.
Or, the longer your femurs (which make the feet further from your center of gravity), the more you must lean the torso forward!
This situation is more prevalent in women. Look at a photo of a woman and man of equal height standing side by side.
Usually the woman’s waist is higher and her legs are longer. Though she may not have long femurs relative to her overall leg length, her femurs may still be longer than her short torso!
This puts her at a biomechanical disadvantage in the squat.
Though some women have visibly long torsos and stubby femurs, this is not the typical build of a woman.
View this video (hopefully it’s still up) of a man with long femurs and a short torso performing a back squat, and if you’re still a critic of this “excuse,” tell me how this man can get his back even a little more upright without falling backwards.
He’s already quite bent over early on in the squat, just to keep from falling backwards.
To the untrained eye, it appears that his form is poor, and I’ll admit, it can be improved despite his “levers.”
But look what he must do to get his shoulders over his feet.
Pause the video right when he gets into the deepest point of the squat.
Imagine him getting his back more upright. Note what would happen to the alignment of his shoulder over his feet; the imaginary vertical line between the two points would be shifted towards behind him at the top — which would send him pitching backwards to the floor!
He has no choice but to fold up to offset the distance his hips are from his knees as he squats.
A longer torso (or shorter femurs) would enable a more upright back, and hence a strong lower back arch.
I’m sure that the forum posters who criticize the long femur to short torso defense would never criticize the guy with the T-rex arms who says his deadlift bombs because of his short arms. Let’s face it: Anthropometrics can’t be ignored.
Lorra Garrick is a former personal trainer certified through the American Council on Exercise. At Bally Total Fitness she trained women and men of all ages for fat loss, muscle building, fitness and improved health.
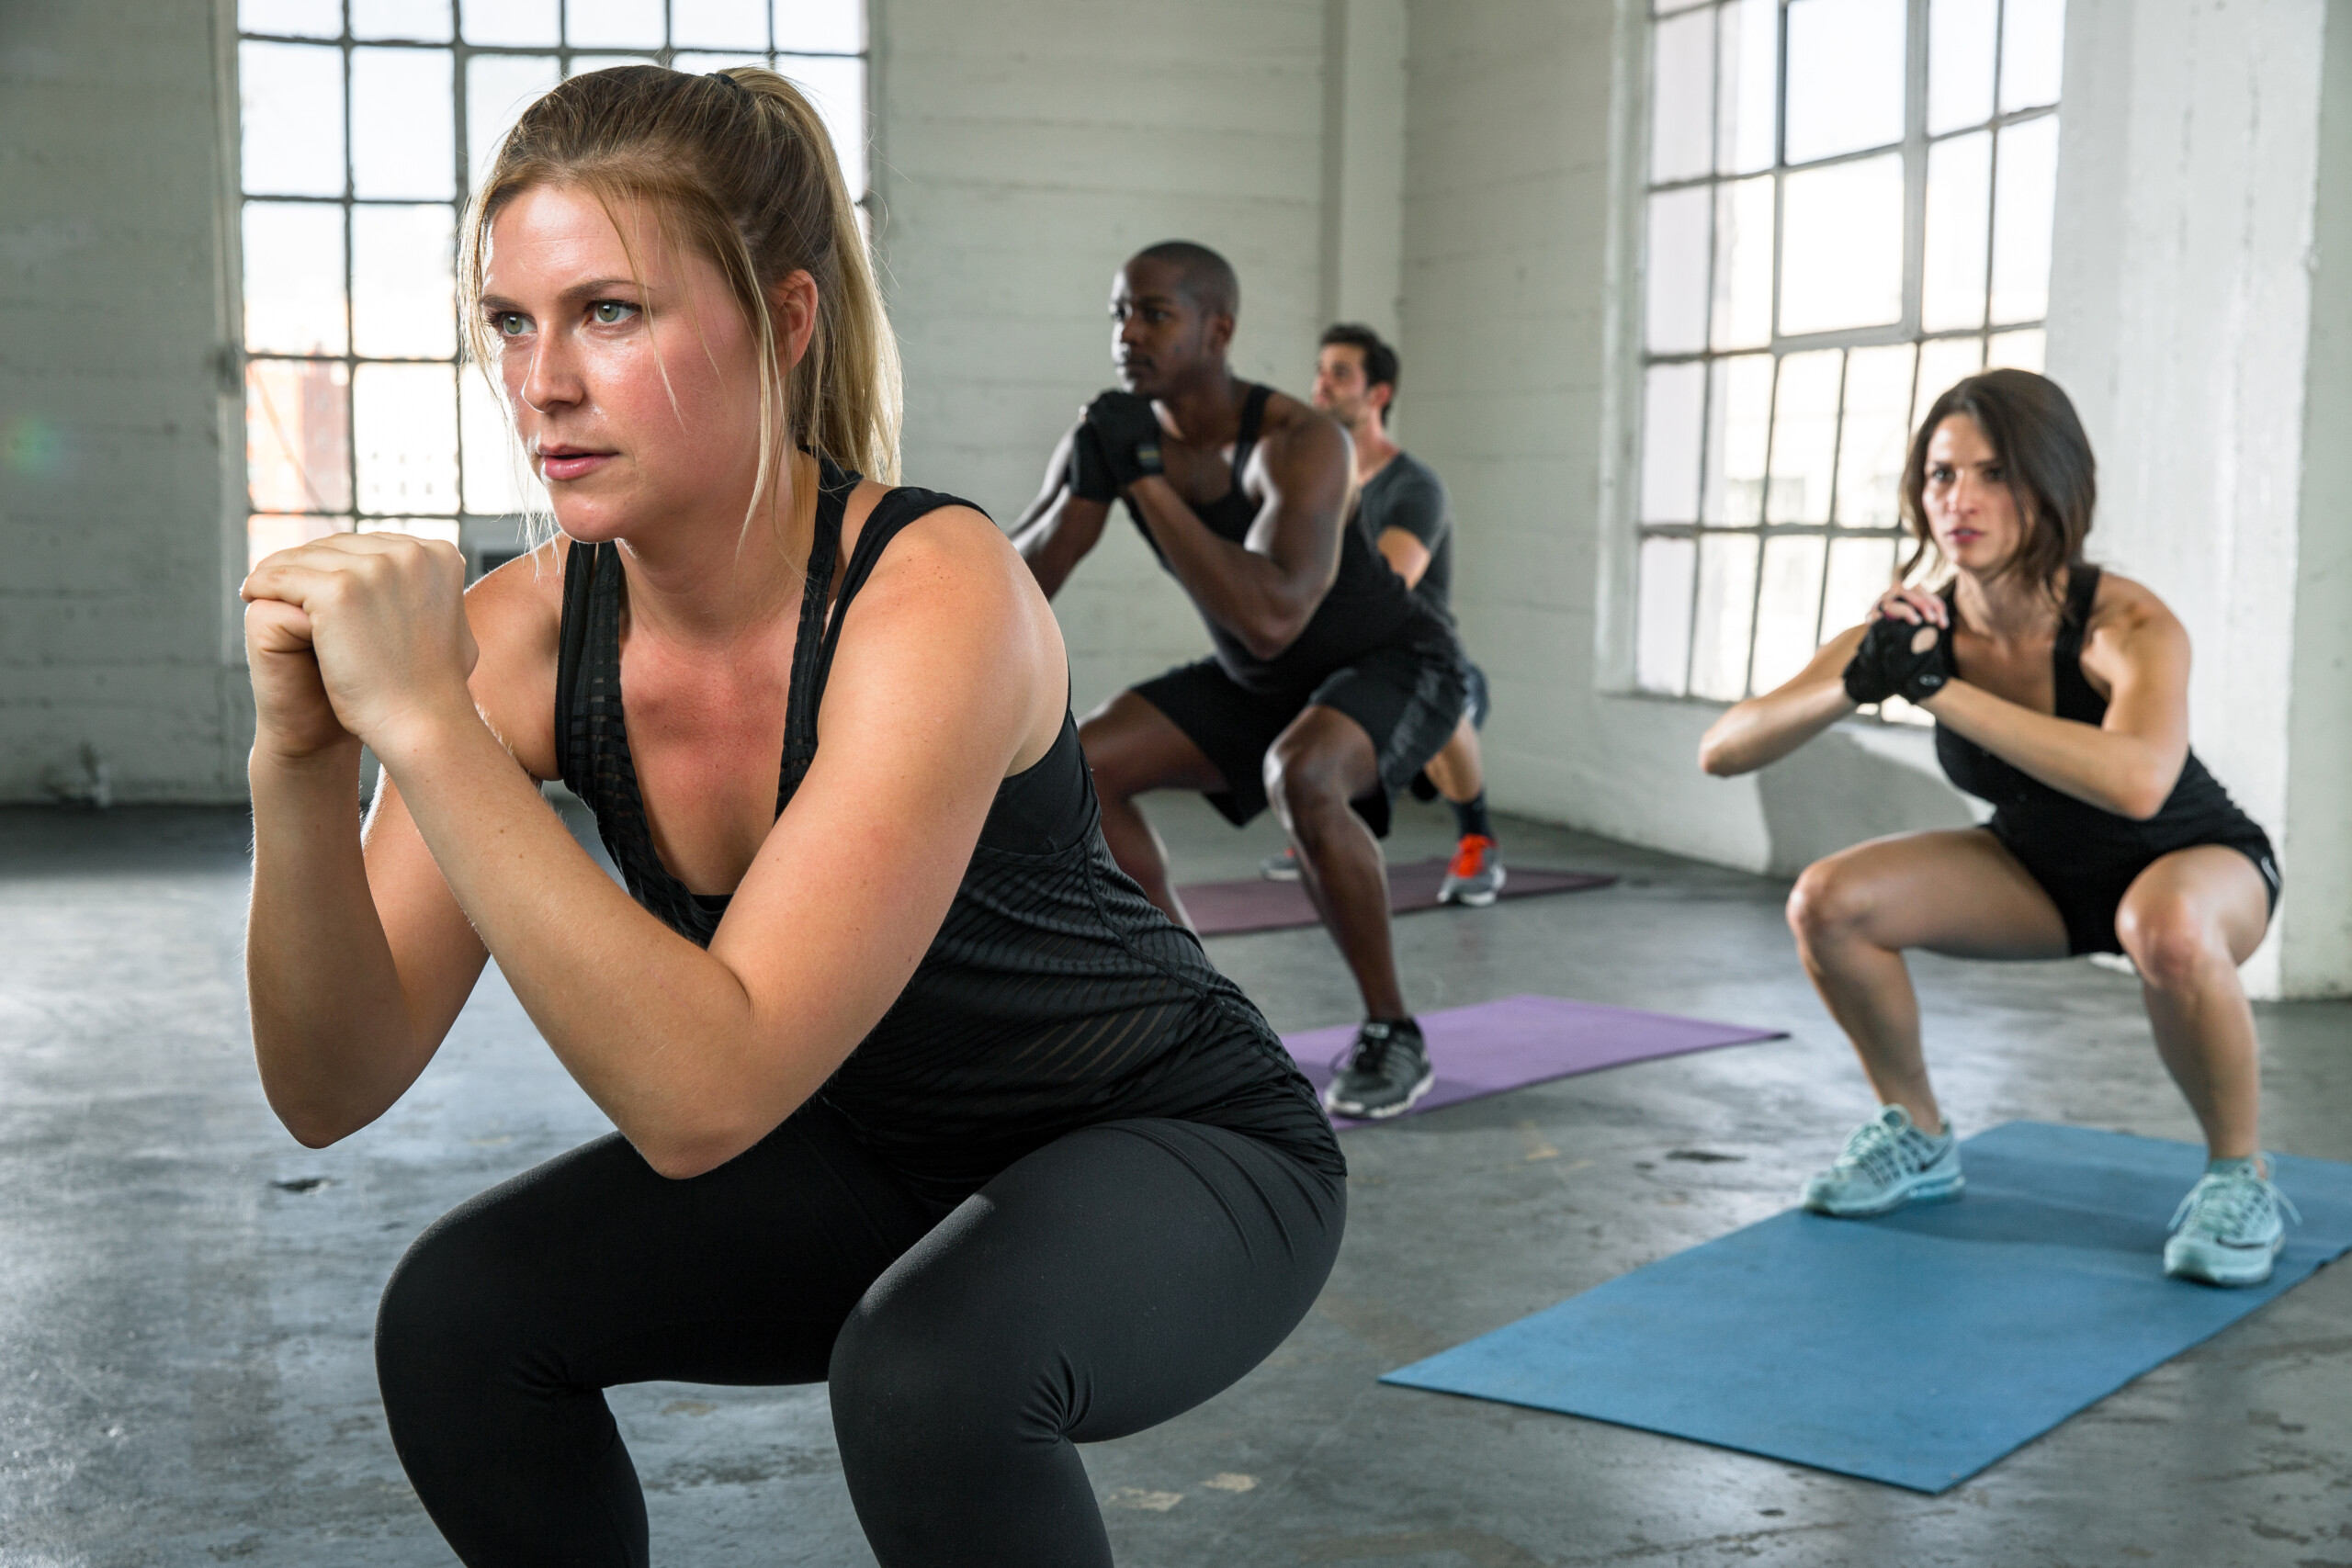
Why You Can’t Go Parallel with Barbell Squats or Even Bodyweight

If you can’t get parallel with squats and fall backwards instead or must hold something in front of you, you won’t like the reason.
Many things have been blamed for not being able to go parallel with squats (free barbell or bodyweight), and often, the most likely culprit gets overlooked.
If you struggle to reach parallel with free barbell or bodyweight squats, you may want to take a look at the length of your thigh relative to your shin. Are you “long thighed” or “short thighed”?
This relativity factor is NOT related to overall body height.
If when you wear shorts, you’re “all thighs,” chances are you have the so-called long femur.
A femur that seems too long for the shin is very likely longer than your torso, and therein lies the problem.
Long femur, short shin
When it comes to barbell or bodyweight squats, a long femur (thigh bone) is a biomechanical disadvantage, especially when paired with a short torso.
In fact, regardless of a person’s height or relative shin length, if their femurs are longer than their torso, this puts them at a disadvantage in the squat.
Many other variables have been blamed on being unable to go parallel with the squat:
Lack of flexibility in the ankles and hips
Weak anterior tibialis muscle (muscle in front of calve)
Stiff lower back; tight calves and poor form.
General weakness. An out-of-shape person, even with femur length shorter than torso length, will likely struggle and end up with bad form (rounded back, hunched shoulders, arms needing to be extending out front to prevent toppling backwards).
Though these are all legitimate reasons for difficulty in parallel squatting, they can also be corrected.
If your femurs are relatively long compared to your shins, coupled with a torso shorter than the femurs, you’re in big trouble.
To counteract the anatomical problem, what must you do?
Someone with poor anthropometrics for the squat must lean their torso very far forward — so far forward that they can lose the arch in their lower back that they’re supposed to have when doing the squat.
In these cases, the back is rounded, chest down. They aren’t in a squat; they are in a crouch.
But even if the back remains straight, it’s still leaned WAY too far forward.
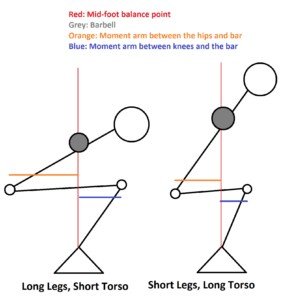
To keep from falling backwards in the barbell squat when parallel, you must have the barbell positioned right over your ankles/midfoot.
To achieve this, the long-femur man or woman (especially with short shins) must really pitch forward to get that barbell over the ankle.
This forces the lower back muscles to absorb considerable tension, increasing injury risk to the lower back and subtracting workload from the quadriceps and glutes.
If a person has great flexibility at the junction of the shin and foot, as well as Achilles tendon flexibility, they could move their knees far ahead of their feet (increase bend in foot/shin junction), which would bring their hips (center of gravity) forward, to get the barbell over the ankles/midfoot.
This would enable him or her to keep balance without leaning their torso over so much.
However, there are several problems here.
1) The shin/foot/Achilles flexibility needs to be developed and may never be enough
2) The knees being so far ahead of the feet puts one in an inefficient position to handle heavy weight, since workload is shifted away from the butt and hamstrings and concentrated too much on the quadriceps, and
3) This positioning puts undue stress on the knees.
The inability to get the feet flat on the floor while in a parallel squat is typically blamed on “poor ankle flexibility.”
Check your femur-to-shin or femur-to-torso proportion; chances are extremely high that this is the problem with parallel squat difficulty.
Now, imagine someone, let’s call him Henry, with very short femurs and crazy long shins; exaggerate these features in your mind as you mentally illustrate the profile.
Henry lowers into a squat. Note how close his hips are to his knees while his thighs are parallel.
With his very long torso, note that Henry hardly has to lean forward to get the barbell over the midpoint of his feet.
The angle that’s created by Henry’s torso with his thighs is significantly bigger than the angle created by the long-femur, short-torso counterpart.
If Henry’s spine is long enough and femurs short enough, his back will be practically upright while he’s parallel in the squat.
Lorra Garrick is a former personal trainer certified through the American Council on Exercise. At Bally Total Fitness she trained women and men of all ages for fat loss, muscle building, fitness and improved health.
.
Top image: Shutterstock/El Nariz

Why Young Children Squat Easier than Adults

Adults who can’t get parallel with a squat, let alone deep, must realize that one reason children squat so easily is body proportions.
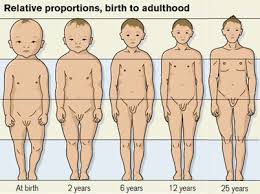
Google “children squatting” and hit “images” and you’ll see toddlers in a very comfortable looking squat position, which makes adults envious who struggle or find it impossible to get into even a parallel position.
Look at the femur length of the toddler above, and compare it to his torso.
What do young children have, as far as natural squatting skills, that adults lack?
Just why IS it easier for children to squat than it is for adults?
If you’re seething with jealousy, it will be of some consolation to know that a lot of this has to do with the length of a child from head to hip, relative to their legs.
Anyone who’s been in the news loop only halfway has certainly read at least one story of a toddler drowning — as a result of tipping headfirst into a bucket of water or a toilet bowl.
The news article goes on to warn parents about this danger because toddlers are top-heavy.

Shutterstock/Nym_Pleydell
A report from the U.S. Consumer Product Safety Commission states that between 1996 and 1999, 58 children under age 5 were reported to have drowned in five-gallon water buckets.
The CPSC report says that “…the stability of these buckets, makes it nearly impossible for top-heavy infants and toddlers to free themselves when they fall into the bucket headfirst.”
Toddlers have also fallen into toilets with tragic outcomes; the CPSC report adds, “The typical scenario involves a child under 3-years-old falling headfirst into the toilet.”
Bottom line: Young children are top-heavy.
This top-heaviness makes it easy for young children to do a full squat and maintain the position.

Shutterstock/savageultralight

Dreamstime/Pavel Losevsky
When adults do back squats with free barbells, the objective is to get the bar aligned vertically with the ankle/midfoot to keep balance.
Those with short torsos will have to lean forward more to do this, making the squat more difficult.
Long femurs add to the problem because the long thigh bones push the hips back, which in turn requires more leaning forward to get the bar over the mid foot.
If a person has a long torso, they don’t have to lean very far forward to align the bar with the foot.
A short legged (especially short-femur) adult with a long torso is a natural squatter; the long upper body lever allows them to stay closer to upright all the way into a deep squat.
So how does this relate to young children easily full squatting?
At birth, the head is one-fourth a baby’s height. In an adult, the head is about one-eighth the body height. This is Physics 101.
A toddler’s head is a big segment of their overall body length, and acts as opposition to the forces that want to pull the body backwards when in a squat.
Think of the young child’s head as the barbell in an overhead squat!
Adults who have difficulty with the parallel back squat will find that the overhead squat is easier, because the positioning of the barbell adds “length” to the upper body, increasing the lever arm, thus reducing the need to lean forward to align the bar with the feet!
A young child’s relatively big head is a built-in overhead bar! Any profile shot of a toddler or preschooler squatting clearly shows this.
In most adults, the head plus trunk make up about one-half the total height. In a baby, the head plus trunk make up five-eighths.
Though five-eighths is only slightly more than four-eighths (which is one-half), this slight difference is more than enough to yield a huge biomechanical advantage in full squatting! As children grow, these proportions shift.
Earlier I pointed out that an adult’s head is one-eighth their height, and a baby’s head is one-fourth.
For children 6.75 years, the head is between one-fifth and one-sixth their body height.
For an adult to have the squatting ease of young children, his head would have to be around one-fifth his height, with head plus trunk being five-eighths total height. You wouldn’t want to look this way.
To better understand the physics, imagine a toddler bending over, like an adult, to pick something off the floor. What would happen? They’d likely pitch headfirst into the floor.
Many other factors influence the ability to squat full and even parallel, including squatting facets, which are bone structures of the talus (ankle bone) and tibia (shin bone) that are adapted to squatting.
As Western peoples get older and eliminate squatting, the facets disappear.
Children are natural squatters, but the vast majority of Western children will lose this as adults.
Lorra Garrick is a former personal trainer certified through the American Council on Exercise. At Bally Total Fitness she trained women and men of all ages for fat loss, muscle building, fitness and improved health.
.
Top image: Shutterstock/ Rozochka
Sources:
cpsc.gov/cpscpub/prerel/prhtml02/02169.html
dace.co.uk/proportion_child_2.htm
toilet-related-ailments.com/squatting-facets.html
Are Long Femurs a Good Excuse for Lousy Back Squat Technique?
Yes, long femurs DO really SCREW up the back squat!
It’s interesting that the men in fitness forums who slam those who insist their long femurs screw up their back squats don’t suffer from long femurs themselves — though they may think they do.
Whenever someone posts that their long femurs cause problems with the back squat, someone invariably posts that HE, too, has the very long femurs (e.g., “I’m 6-3 but go ATG without a problem!”)
The “long femur” in the strength training and powerlifting community refers to length of thigh RELATIVE to torso. It can be one of two ways:
1) Femur is longer than torso—and torso may be medium relative to body, or short, relative to body, but the bottom line is the femur is longer than the torso. OR…
2) Torso is same length as femur, but the problem is that the shin is too short, relative to length of femur. So even though femur-torso relationship is okay, the short shin creates the problem.
It can also refer to the length of the femur relative to the length of the shin (from knee to ankle). A “short shin” will impact the squat.
We are not all built the same.

We can’t all be built the same for the back squat yet built differently when it’s time to be fitted for a suit, or when adjusting the car seat angle plus its proximity to the pedals plus its height.
Ironically, these same critics will agree:
#1. Long, “ape-like” arms (relative to the body height) are a big disadvantage in bench pressing.
#2. Short, “T-rex” arms (relative to the body height) are a big disadvantage in the deadlift.
#3. Long “spider” arms will kill anyone’s chance at excelling with Olympic-style weightlifting.
Oddly, these critics slam the long femur excuse for a lousy back squat.
The difference in bench press and back squat body proportions is this:
No matter how “disadvantaged” the ape armed person is compared to the T-rex armed person, the “gorilla” can STILL bench press with perfect form and efficiency (though they’re at greater risk for rotator cuff strain). It’s just that they probably won’t win competitions.
In the case of the long femurs to regular torso, or the regular femurs to short torso, or long femurs to short torso, and especially relatively short shins tossed into this equation — these proportions get in the way with the ability to efficiently perform the back squat.
Such proportions force the athlete into a very bent-forward position, unlike the genetic freak below:
One must fight to keep his or her back in decent position, battling to keep it from rounding.
There is also ongoing tension in the entire vertebral column due to this awkward positioning of having to lean so far forward yet maintain the lower back ARCH.
Can bad proportions be offset by increasing one’s ankle, hip and knee flexibility?
To a small degree, yes. But there are limits to how far you can drive your knees over the ankles (though Olympic-style weightlifters are trained for significant dorsiflexion).
If the knee is too far over the toes, this puts strain on the knee joint.
Hips can only sink so far, too. These fine-tuning adjustments make a difference, but there’s no substitute for being born with great proportions!
Even if you developed amazing flexibility in the ankle, this fails to solve the bad biomechanics of longer femur to torso proportion, because the significant angling forward of the knees (due to extreme ankle flexibility) is akin to doing the back squat with one’s heels on a little platform!
That’s a lot of tension on the knee’s patellar tendon!
Imagine performing back squats while you’re on the balls of your feet.
Forget the balance issue. Instead, imagine how your knees would feel, going up and down this way with heavy weight across the back.
If your femurs exceed the length of your torso, you have a legitimate concern, especially with ATG (“ass to grass”).
Try the following adjustments:
1) Widen the stance; work on hip flexibility.
2) Slightly point feet outward (this naturally coincides with a wider stance).
3) Wear a one-inch heel insert, which produces the same effect as pricey lifting shoes.
If these adjustments fail, the back squat just isn’t your thing; focus on other leg exercises (split squats, dumbbell squats, box squats). On the flip side, long femurs are an advantage in kickboxing!
Lorra Garrick is a former personal trainer certified through the American Council on Exercise. At Bally Total Fitness she trained women and men of all ages for fat loss, muscle building, fitness and improved health.
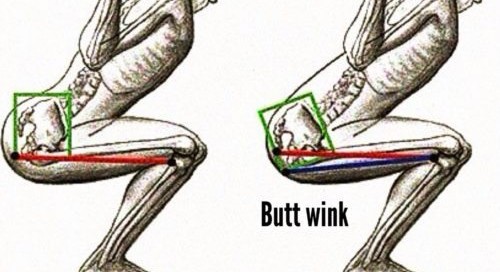
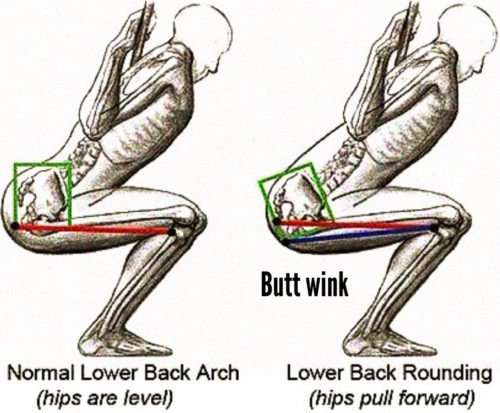
Why the Squat Butt Wink Is Bad & Why It Needs to Go

The so-called butt wink in a back squat is bad news and if you have this problem, it needs to be corrected.
Many people butt wink when they perform a squat. Many don’t realize they do this. Why is the butt wink a bad thing?
Well, look at someone doing this. What do you see?
A butt wink is when the lower back loses its extension and morphs into rounding, as the person lowers deeper into the squat.
Some people do the butt wink right before they bottom out, while others experience it a little bit before they reach their depth (whether that’s parallel femurs or deeper).
The butt wink is not deliberate or intentional. It just happens, and there are varying explanations.
How many times have you heard, “Never round the lower back,” when it comes to the squat? Yet, the butt wink is precisely that.
So what’s so bad about a rounded lower back in the squat exercise?
Plenty. The lower back (erector spinae) muscles are stabilizers. They are not force-production muscles.
Their job is to stabilize the spine and transfer forces from the upper body to the lower body, not move heavy weight.
This is why low back injury can result when someone lifts a heavy item off the ground while their lower back is rounded, trunk flexed forward.
The erector spinae are not supposed to absorb forces that the legs and glutes are supposed to absorb.
When a person is at the bottom of a squat, in a butt wink, the erector spinae muscles are absorbing forces that they shouldn’t be, even though the man or woman may not feel this occurring.
When they begin rising out of the squat, the butt will “unwink.” In order for this to happen, the low back muscles must engage before the legs and glutes do.
Once the low back is returned to an extended (arched) position, the legs and glutes can take over.
The risk of low vertebral injury increases as the weight load increases. A “rounded back” during a squat doesn’t always have to resemble the Hunchback of Notre Dame’s.
- Watch someone butt winking.
- It can be quite subtle, but when it’s there, even a half-trained eye can detect it.
- It doesn’t look right, and there’s a reason for that; it’s not right.
Though the increased risk of low back injury is slight if the load isn’t that heavy, who needs strain in this region?
The risk is higher in people who already have tweaky erector spinae muscles.
The butt wink is bad. Make a concerted effort to kick this problem once and for all.
Lorra Garrick is a former personal trainer certified through the American Council on Exercise. At Bally Total Fitness she trained women and men of all ages for fat loss, muscle building, fitness and improved health.
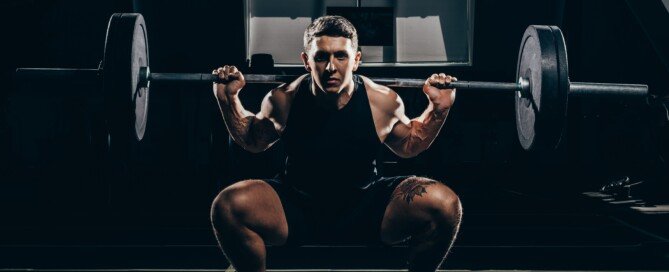
Long Femurs: Why Wide Stance Makes Parallel Squats Easier
This article explains in plain English the fascinating reason why a wide stance makes squatting parallel so much easier for long femurs.
If you know that long femurs have been hampering your ability to go parallel in a squat, you’ve probably figured out at some point or have been told or read that a wide stance will correct the problem.
I’m a former personal trainer…but…I also have long femurs relative to my shin length, which causes the same issue as femurs exceeding the torso length.
To understand why a wide stance makes the parallel squat so much easier for those with long femurs, it’s important to know why a long femur creates an obstacle to squatting parallel.
NOTE: When I say “long femur,” this refers to relative thigh bone length to the rest of the leg, and has absolutely nothing to do with a person’s height!
A person who has a long thigh and short shin has a long femur, even though they may stand only 5-5.
As one descends into a squat, the hips get pushed out further away from the foot in terms of horizontal distance.
Shutterstock/IvanRiver
In order to keep balance, there must be a vertical line between the ankle/midfoot and behind the shoulders.
As you lower into a squat, this vertical line must be maintained or you’ll fall backwards.
To maintain this vertical line, you lean your torso forward, to bring the shoulder over the ankle/midfoot.
If you don’t lean over far enough, you’ll start falling backwards. You don’t want to lean more forward than you have to.
The more forward you lean, the more that the parallel squat becomes a low back exercise.
If you have long femurs, your hips will be pushed back far from that imaginary vertical line that extends up from the ankle/midfoot.
To counteract this, you must lean the torso in more than if you had short thigh bones.
If your femurs are long enough (again, this is relative to overall leg length and is not related to height), you will need to lean the torso over so far that it’s approaching parallel to the floor. This is an incorrect squat position.
Imagine a barbell across your upper back while your torso is parallel to the floor while you’re squatting parallel. This is not a back squat. It looks more like the good-morning exercise — shown below.
Everkinetic.com

The reason someone with long femurs can’t squat parallel while maintaining even a 45 degree torso lean is because even at this much of a lean, the back of his shoulders still does not meet up with that imaginary vertical line.
It’s “behind” it, because the long femurs have his hips pushed out so far.
Why does a wide stance make parallel squats easier?
Freepik
The wide stance makes squatting parallel possible without having to pitch the torso forward like a good-morning exercise.
In fact, the wide stance can enable someone with long femurs to be quite upright; if the stance is wide enough, feet pointed out, one’s spine can actually be vertical.
But as the stance widens, the muscle recruitment changes.
When the stance is wide, the horizontal distance from hips to knees is shortened. This mimics a short femur.
Even though the knees are displaced outward, it’s that horizontal or forward distance between hips and knees that makes the difference.
The body now “thinks” it has short femurs!
The hips, then, aren’t thrust out so far behind the person.
Thus, he does not need to lean his torso over so much to align the back of his shoulder (where a barbell would go in a back squat) with his ankle/midfoot.
If the wide stance is uncomfortable on the knees, angle the feet out enough to relieve the discomfort.
If the stance is wide enough (especially with feet pointed out), the adductor (inner thigh) muscles will absorb considerable tension.
Stiff hips will make a very wide stance uncomfortable. Good hip flexibility is a must.
Go only as wide as necessary to maintain a parallel squat unless you want more adductor focus.
If long femurs are a problem with doing a parallel squat, widen your stance and see what happens.
Lorra Garrick is a former personal trainer certified through the American Council on Exercise. At Bally Total Fitness she trained women and men of all ages for fat loss, muscle building, fitness and improved health.
.


